
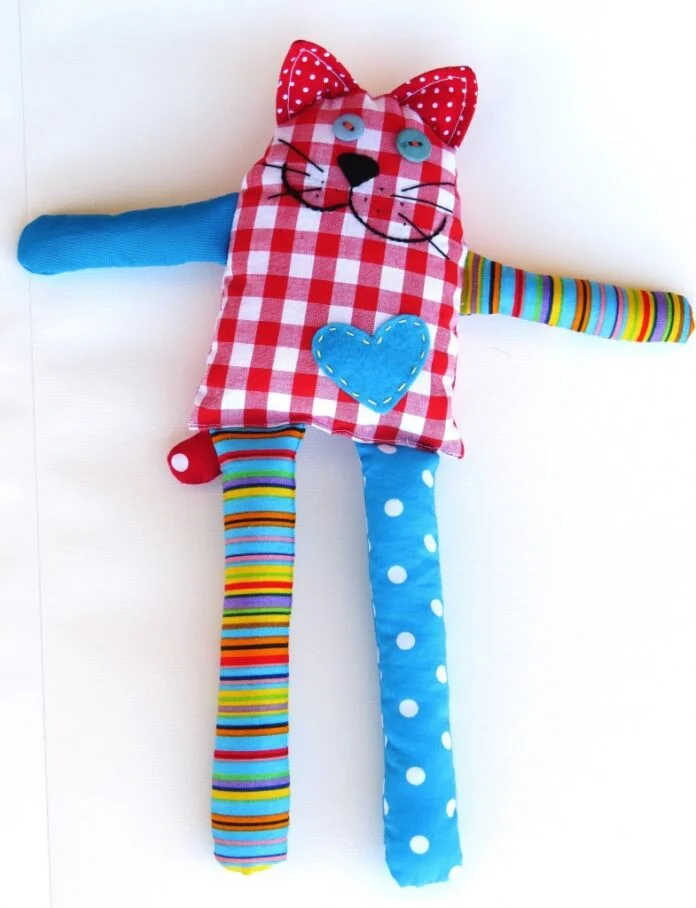
The Steps for Sewing Bernie the Cat – Quilt Pattern is a delightful quilting project that combines charm, creativity, and practicality. Whether you are a seasoned quilter or someone just starting on your sewing journey, this pattern offers an approachable way to create a unique, cat-themed quilt block or decorative piece. Bernie the Cat is a playful design that can be adapted into wall hangings, pillows, or even incorporated into larger quilts. The best part is that the process is enjoyable and allows for plenty of personal touches through fabric selection, color choices, and quilting techniques.
When working on the Steps for Sewing Bernie the Cat – Quilt Pattern, you’ll quickly realize that this project is more than just assembling fabric. It’s about creating a little personality within your quilting work. Each step, from cutting the fabric pieces to stitching them together, contributes to bringing Bernie to life. With his whimsical shape and the opportunity for expressive details, Bernie can become a charming character in your sewing projects, adding warmth and joy to your creations.
In this guide, we will go through all the Steps for Sewing Bernie the Cat – Quilt Pattern in detail. You will learn how to select the perfect fabrics, cut and assemble the pieces accurately, stitch the components with precision, and add final touches that give Bernie his distinct personality. With clear instructions and a focus on both functionality and beauty, you’ll be ready to create your own version of Bernie the Cat with confidence and creativity.
1. Choosing Fabrics and Tools for Bernie the Cat
The first step in the Steps for Sewing Bernie the Cat – Quilt Pattern is gathering the right fabrics and tools. Since Bernie’s design has distinct shapes and playful details, fabric choice is essential to achieving the desired look. Opt for quilting cotton in a variety of colors or patterns that complement each other. A solid or subtly textured fabric works beautifully for Bernie’s body, while patterned fabrics can add fun to his ears, tail, or background.
When selecting colors, think about contrast. Choosing a background that is lighter or darker than Bernie will help the design stand out. Prints with small motifs work well for adding character without overwhelming the main figure. You can also use scraps from your stash to give Bernie a patchwork-style charm.
In addition to fabrics, you’ll need quilting essentials like a rotary cutter, cutting mat, quilting ruler, and pins or clips. High-quality thread that matches your fabrics will help make the stitching nearly invisible while ensuring strong seams. A sewing machine with a quarter-inch foot is especially helpful for maintaining accuracy in your piecing.
Interfacing or lightweight batting may be needed if you plan to make Bernie part of a quilted cushion or wall hanging. This will add structure and dimension to the finished piece, enhancing its appeal.
Taking time at this stage to choose complementary fabrics and gather reliable tools will set you up for success. With everything prepared, you’ll be ready to move on to cutting and assembling Bernie’s features with ease.
2. Cutting and Assembling the Quilt Pieces
In the Steps for Sewing Bernie the Cat – Quilt Pattern, precise cutting is essential to ensure all parts fit together neatly. Begin by referring to your template or pattern pieces. Each part of Bernie—the head, body, ears, tail, and background—should be cut according to the given measurements. Remember to include seam allowances, typically ¼ inch, so the finished piece matches the intended size.
Lay out your fabric on a cutting mat and use a rotary cutter along with a quilting ruler for clean, straight cuts. For curved sections, such as the tail or head outline, fabric scissors may provide better control. Keeping pieces organized as you cut them will save time during assembly.
Once all pieces are ready, start with the main body. Pin or clip the sections together, aligning edges carefully. Sew using a consistent seam allowance, pressing seams open or to the side as you go to reduce bulk. Accurate pressing will make a noticeable difference in the final appearance of Bernie.
As you piece Bernie’s face and ears, take care to match points and corners. These details are where Bernie’s character starts to emerge. Small appliqué pieces, such as eyes or a nose, can be added later for more expression.
If your design includes a pieced background, assemble it separately before joining it to Bernie’s figure. This approach keeps the main design crisp and avoids distortion.
By the end of this stage, you’ll see Bernie taking shape, and your quilt block will start to feel like a completed work of art ready for quilting.
3. Stitching and Quilting Bernie the Cat
The next stage in the Steps for Sewing Bernie the Cat – Quilt Pattern involves securing the pieces together and adding quilting stitches to enhance the design. Begin by sewing the completed Bernie block to any additional background sections if needed. Ensure all seams lie flat and edges are even before quilting.
Layer your quilt top (with Bernie), batting, and backing fabric. Secure the layers with quilting pins or basting spray to prevent shifting during stitching. The quilting lines can follow the outline of Bernie to emphasize his shape or use decorative patterns like swirls, crosshatching, or straight lines for texture.
If you are new to quilting, simple straight-line stitching is an excellent choice. It’s easy to control and gives a clean, modern look. More experienced quilters may enjoy experimenting with free-motion quilting to add fur-like textures or playful background designs.
Appliqué features like Bernie’s eyes, whiskers, or a collar can be sewn at this stage. Using embroidery thread or contrasting stitching adds extra charm. If you prefer, fabric paint or heat-transfer vinyl can also create these small details.
Quilting not only secures the layers but also adds visual depth to the piece. Bernie will stand out more vividly against the quilted background, making him the star of your project.
By completing this step, your Bernie block is not only structurally sound but also visually appealing, ready for finishing touches.
4. Adding Final Details and Finishing the Quilt Pattern
The last step in the Steps for Sewing Bernie the Cat – Quilt Pattern focuses on the final touches that bring Bernie’s personality to life. These small details can transform your quilt block from a simple design into a captivating piece of art.
Begin by adding facial features if you haven’t already. Hand embroidery is a popular choice, giving Bernie a soft and handmade look. Simple stitches can form whiskers, a smile, or expressive eyes. You can also use buttons, felt, or small fabric appliqués for extra texture.
Consider enhancing the background with additional quilting or decorative stitching. This can highlight Bernie’s figure and make the entire composition more dynamic. Even small accents like paw prints in the quilting design can add a playful theme.
Trim any loose threads and square up the block so it’s ready for its final use. If Bernie is part of a larger quilt, ensure all blocks are the same size for easy assembly. If making a cushion, add a zipper or envelope closure for convenience.
You might also frame Bernie as a wall hanging, adding a border or binding to complete the look. Choosing a binding fabric that complements Bernie’s colors will help frame the design beautifully.
By paying attention to these final details, you’ll end up with a finished project that’s both polished and full of personality—a keepsake you’ll treasure or a thoughtful handmade gift.
FAQ – Steps for Sewing Bernie the Cat – Quilt Pattern
1. Is this pattern beginner-friendly?
Yes, the Steps for Sewing Bernie the Cat – Quilt Pattern is suitable for beginners with basic sewing skills, especially if they follow the instructions carefully.
2. What size is the finished Bernie block?
The size can vary depending on the template, but most versions fit within a standard quilt block dimension like 12″x12″ or 14″x14″.
3. Can I make Bernie using scraps?
Absolutely. This pattern is perfect for using leftover fabric scraps, which can add a unique and colorful patchwork effect.
4. Do I need special quilting tools?
A rotary cutter, quilting ruler, and good-quality thread are recommended. A sewing machine with a quarter-inch foot will help maintain accuracy.
5. Can Bernie be made into something other than a quilt?
Yes, you can turn Bernie into a pillow, tote bag panel, or wall art by adjusting the assembly and finishing steps.
6. How do I give Bernie more personality?
Personal touches like embroidered whiskers, appliqué details, and creative quilting patterns will make Bernie truly one-of-a-kind.
The Steps for Sewing Bernie the Cat – Quilt Pattern offer an enjoyable and creative quilting project that blends precision sewing with playful artistry. From selecting fabrics and assembling the pieces to quilting, adding final touches, and personalizing details, each step builds on the last to bring Bernie to life. This pattern is adaptable, beginner-friendly, and a wonderful way to express your quilting style.
I hope this guide has inspired you to create your own version of Bernie the Cat—please share your honest thoughts and suggestions so we can continue to improve and inspire fellow makers.