
The “Rondo” Drawstring Bag Tutorial – Quilt Pattern is a delightful sewing project that combines practicality with creativity. If you enjoy quilting and are looking for a functional accessory to showcase your skills, this tutorial is perfect for you. The round shape, combined with the drawstring closure, makes this bag unique while offering plenty of room for storage. Whether you use it for carrying cosmetics, small crafts, or everyday essentials, the “Rondo” drawstring bag is stylish, versatile, and fun to make.
What makes the “Rondo” Drawstring Bag Tutorial – Quilt Pattern special is the way quilting techniques are incorporated into the design. Quilters love how the circular base and pieced panels allow for fabric play and creative layouts. From bold modern prints to traditional patchwork, the possibilities are endless. The drawstring closure is not only practical but also adds charm, giving the bag a handmade touch that stands out. This makes it a great project for personal use or thoughtful handmade gifts.
In this article, we will walk through everything you need to know to complete the “Rondo” Drawstring Bag Tutorial – Quilt Pattern. We’ll discuss fabric selection, cutting and piecing techniques, sewing the round base, attaching the drawstring casing, and adding finishing details. You’ll also find helpful tips to make the process easier, plus a FAQ section that answers common questions. By the end, you’ll feel confident about making this project, whether you are a beginner or an experienced quilter.
1. Choosing Fabrics and Materials
When starting the “Rondo” Drawstring Bag Tutorial – Quilt Pattern, fabric selection is one of the most exciting steps. Quilting cotton is a popular choice because it’s lightweight, durable, and comes in countless colors and prints. You can mix and match fabrics to create a bold contrast or choose coordinating shades for a subtle, elegant look.
For the lining, it’s best to use cotton or another breathable fabric. A fun patterned lining can make the inside of the bag just as beautiful as the outside. If you want a sturdier bag, consider adding fusible fleece or interfacing between the layers to give structure and durability.
The round base of the bag is where quilting truly shines. Using scraps of different fabrics, you can piece together a patchwork design that becomes the highlight of the project. Alternatively, you could choose one statement fabric to showcase on the base.
The drawstring itself can be made from cotton cord, ribbon, or even sewn fabric strips. Each choice gives a slightly different look, from casual and modern to delicate and decorative. Choosing the right drawstring will complement your design.
Don’t forget about the thread. High-quality cotton or polyester thread in a matching or contrasting color will enhance your bag’s overall appearance. A pop of contrast stitching can also become a design feature.
Finally, basic sewing tools like a rotary cutter, quilting ruler, cutting mat, and sewing machine are essential. With the right materials in place, you’re ready to move on to cutting and piecing.
2. Cutting and Piecing the Quilted Panels
The “Rondo” Drawstring Bag Tutorial – Quilt Pattern begins with carefully cutting your fabric pieces. Precision is key because clean cuts lead to better seams and an overall polished finish. Using a rotary cutter and ruler makes this process faster and more accurate.
Start by cutting fabric pieces for the circular base, side panels, lining, and drawstring casing. The circular base can be made as a single fabric piece or as a patchwork panel pieced together. If you choose patchwork, remember to use a ¼-inch seam allowance for neat joins.
Once your pieces are cut, arrange them in the desired layout. Many makers enjoy experimenting with color placement and patterns before sewing. This planning step ensures that your final bag looks cohesive and visually appealing.
After arranging your fabrics, sew the pieces together to form the main outer body. Press each seam carefully with an iron to keep the fabric flat and help the panels align better during assembly. Good pressing habits result in a more professional finish.
Next, add batting or fusible fleece behind the quilted panels. This step gives structure and also allows for decorative quilting. You can choose straight-line quilting, echo quilting around shapes, or free-motion designs to personalize the project.
At this stage, you should have all your quilted panels ready—outer fabric, lining, and base—making it easier to assemble the bag in the next steps.
3. Sewing the Round Base and Drawstring Casing
One of the highlights of the “Rondo” Drawstring Bag Tutorial – Quilt Pattern is its round base. This feature sets it apart from standard drawstring bags and gives it a stylish, unique shape. Sewing a circular base requires patience, but with practice, it becomes much easier.
Start by pinning or clipping the circular base to the quilted side panels, right sides together. Use plenty of clips to keep the curve smooth and prevent puckering. Sew slowly, easing the fabric around the curve. A walking foot attachment can be helpful for this step.
Once the base is attached, repeat the process with the lining pieces. The lining ensures the inside of the bag looks neat and protects the seams from wear. When the lining and outer shell are complete, you can move on to the drawstring casing.
The casing is a strip of fabric sewn along the top edge of the bag to hold the drawstring. Fold the strip, press, and stitch it securely, leaving space for the drawstring to pass through. Reinforce the edges where the drawstring enters and exits the casing to prevent fraying.
After the casing is complete, thread your chosen cord, ribbon, or fabric ties through using a safety pin or bodkin. Pull the ties evenly so the bag cinches neatly at the top. This creates the signature drawstring closure.
With the base and casing finished, your bag is almost complete. The last step involves adding finishing details to personalize and strengthen the design.
4. Adding Finishing Touches and Personalization
The final stage of the “Rondo” Drawstring Bag Tutorial – Quilt Pattern is where you can get creative and personalize your bag. Adding decorative stitching, appliqué, or embroidery is a great way to give the bag a unique look. These details make handmade items stand out from store-bought versions.
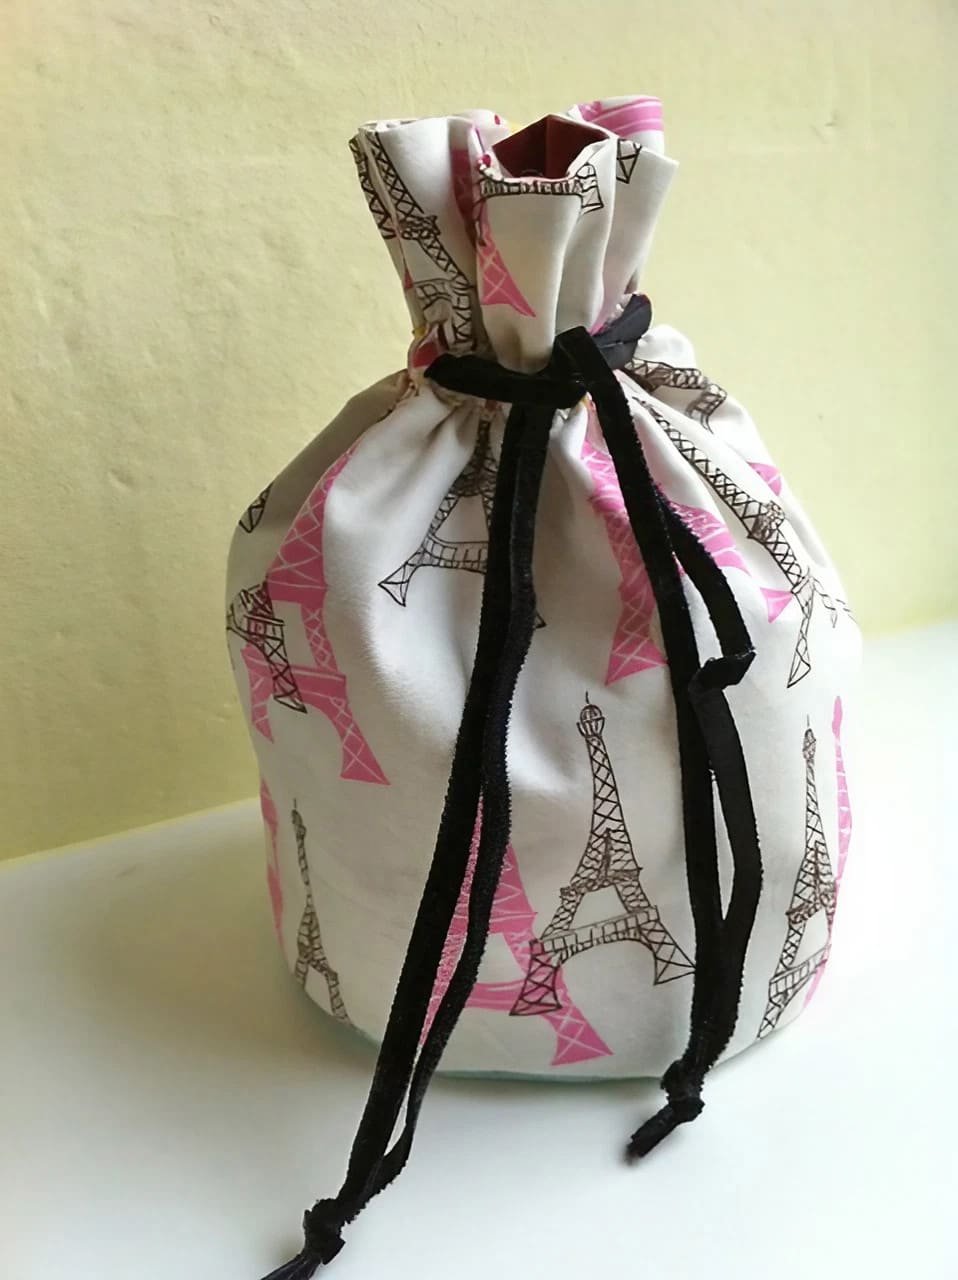
You can also play with the type of drawstring you use. A velvet ribbon gives a soft, elegant finish, while a colorful cord adds a playful touch. Adding small charms or beads to the drawstring ends can make the bag even more distinctive.
For a more professional look, consider topstitching around the edges of the drawstring casing. This helps the fabric lie flat and adds durability to an area that gets a lot of use.
If you’re giving the bag as a gift, adding a personalized fabric label is a thoughtful touch. This small addition makes the bag feel special and memorable.
Another idea is to experiment with different quilting patterns on the panels. Diagonal lines, swirls, or geometric motifs can completely change the overall feel of the bag. The quilting not only looks beautiful but also adds strength.
With these finishing touches, your bag will be ready to use or gift. It’s a functional, stylish, and handmade project that reflects your personality and sewing skills.
FAQ – “Rondo” Drawstring Bag Tutorial – Quilt Pattern
1. Is the “Rondo” drawstring bag suitable for beginners?
Yes, beginners can make this bag with careful attention to instructions. The circular base may be a challenge at first, but it becomes easier with practice.
2. What fabrics work best for this quilt pattern?
Quilting cotton is ideal, but medium-weight fabrics like canvas or linen can also be used for a sturdier bag.
3. Do I need quilting experience to make this bag?
Not necessarily. Basic sewing skills are enough, though quilters will enjoy the creative aspect of piecing and quilting the panels.
4. Can the size of the bag be adjusted?
Yes, you can enlarge or reduce the pattern to make different sizes. The design is flexible and works for small gift bags or larger tote-style versions.
5. How do I make the bag sturdier?
Adding fusible fleece, batting, or interfacing between fabric layers gives the bag more structure and durability.
6. What is the best type of drawstring to use?
Cotton cord, ribbon, or fabric strips all work well. Choose based on the look you want to achieve.
The “Rondo” Drawstring Bag Tutorial – Quilt Pattern is a fun, creative, and rewarding project for anyone who enjoys sewing or quilting. From choosing fabrics to cutting and piecing, sewing the round base, and adding a charming drawstring closure, each step brings you closer to a functional handmade accessory.
This project is perfect for personal use, practical storage, or thoughtful gifts. Now that you’ve learned the process and tips, I’d love to hear your honest opinions and suggestions. What did you enjoy most about this tutorial, and how would you personalize your own Rondo drawstring bag?