
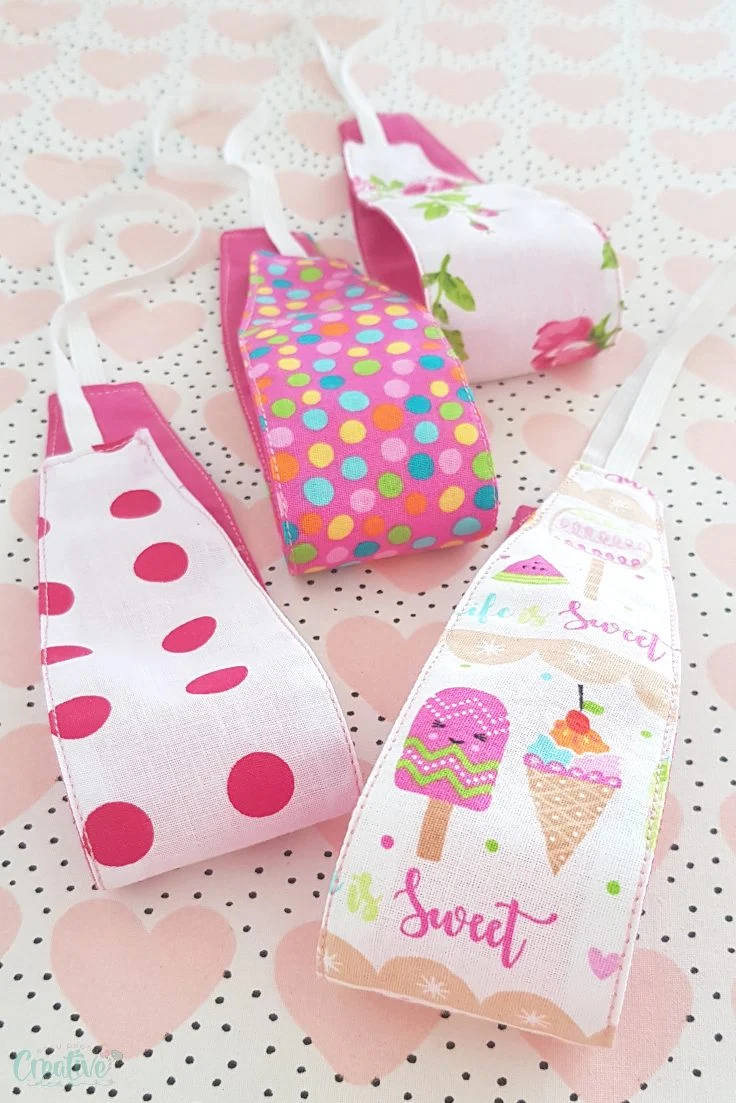
The Reversible fabric headband pattern – Quilt Pattern is a delightful sewing project that blends style, comfort, and practicality. This versatile accessory is perfect for adding a personal touch to your outfits while keeping your hair in place. What makes it even more exciting is that it’s reversible, giving you two looks in one piece. Whether you choose bold prints, soft pastels, or seasonal fabrics, the design allows you to express your creativity while practicing essential quilting techniques.
Creating a Reversible fabric headband pattern – Quilt Pattern is not only fun but also an excellent way to use up fabric scraps from other quilting projects. The combination of quilting and sewing skills ensures the headband is both sturdy and comfortable. This project is beginner-friendly yet engaging for experienced sewists who enjoy quick, satisfying creations. Plus, since it’s small, it’s an ideal choice when you want to complete a handmade item in just a short amount of time.
In this article, we’ll explore how to select the best fabrics, prepare your materials, quilt the fabric, and assemble the reversible headband. We’ll also share tips for customizing your design to match different styles, occasions, or gift ideas. By the end, you’ll have all the knowledge you need to create a unique, comfortable, and stylish headband that’s as functional as it is beautiful.
1. Choosing Fabrics and Materials for Your Reversible Headband
The success of your Reversible fabric headband pattern – Quilt Pattern begins with selecting the right fabrics. Cotton quilting fabric is a popular choice because it’s breathable, easy to sew, and available in endless patterns and colors. Since the headband is reversible, you’ll need two different fabrics—each one will show on a different side.
When choosing fabrics, consider contrast. A bright floral on one side and a soft solid on the other can create a striking effect. If you prefer a subtle look, choose two fabrics within the same color family but with different textures or prints. This will make the headband versatile enough to match various outfits.
In addition to fabric, you’ll need interfacing or lightweight batting to add structure without making the headband stiff. This will help the headband keep its shape and stay comfortable against your head. For the elastic section, choose a soft, durable elastic that matches or complements your fabric.
Gather basic sewing tools such as a rotary cutter, ruler, pins or clips, and a sewing machine. A pressing iron is also essential for achieving crisp seams and a polished final look. With these materials prepared, you’ll be ready to begin your quilting process.
Remember, the better the quality of your materials, the more professional and long-lasting your headband will be. Investing a little extra in good fabrics and elastic can make all the difference in comfort and durability.
2. Cutting and Quilting the Fabric Pieces
Once you’ve selected your materials, the next step in creating your Reversible fabric headband pattern – Quilt Pattern is cutting your fabric pieces to the correct size. Precision is key here, as mismatched pieces can lead to uneven seams and a less polished final product.
Typically, you’ll cut two long strips—one from each fabric—along with a smaller strip for the elastic casing. Make sure both main strips are the same size so they align perfectly during sewing. If you’re using batting or interfacing, cut it to match the fabric pieces as well.
Layer one fabric strip over the batting or interfacing and smooth out any wrinkles. This is when you can add quilting to the fabric. Simple straight-line quilting works beautifully and is quick to sew, but you can also experiment with diagonal lines, waves, or decorative stitches for extra personality.
Quilting the fabric not only adds texture but also makes the headband more durable. The stitched layers are less likely to shift during wear and washing, ensuring your headband maintains its shape over time.
Once your quilting is complete, give each piece a good press to flatten seams and prepare for assembly. Taking your time in this step ensures a clean and professional-looking result later on.
By carefully cutting and quilting your fabrics, you set the foundation for a headband that looks as good as it feels. This attention to detail will shine through in the finished accessory.
3. Sewing and Assembling the Reversible Headband
The assembly process for the Reversible fabric headband pattern – Quilt Pattern is straightforward but requires attention to detail for a neat finish. Begin by placing your two main fabric strips right sides together, aligning all edges carefully. Pin or clip them in place to prevent shifting during sewing.
Sew along the long edges with a ¼-inch seam allowance, leaving the short ends open. This creates a fabric tube that will later be turned right side out. Trim excess batting or interfacing from the seam allowances to reduce bulk and create smoother edges.
Turn the fabric tube right side out and press it flat, ensuring the seams are centered along the sides. This step gives your headband a crisp appearance and makes the next steps easier to manage.
Next, prepare the elastic casing by folding the smaller strip lengthwise and sewing along the edge to create a narrow tube. Insert the elastic using a safety pin, then stitch the ends of the elastic to the ends of the casing to secure it in place.
Attach the elastic casing to the open ends of the main headband piece, ensuring the raw edges are aligned. Fold the fabric over the casing ends and sew securely. This will connect the two sides of the headband while maintaining its reversible function.
With the elastic attached and seams reinforced, your headband is now ready for final finishing touches. Try it on to ensure a comfortable fit and make any adjustments as needed.
4. Adding Finishing Touches and Personalization
Now that your Reversible fabric headband pattern – Quilt Pattern is complete, it’s time to add special details that make it uniquely yours. Personalization is one of the joys of handmade items, allowing you to express your creativity and style.
One easy way to enhance the design is by adding decorative topstitching along the edges. This not only secures the seams but also adds a polished, professional look. Choose a thread color that either blends in for subtlety or contrasts for a bold effect.
You can also embellish your headband with fabric appliqués, embroidery, or even small fabric-covered buttons for a charming touch. These extras make the accessory feel custom-made and can be tailored for special occasions or gifts.
Consider making themed headbands for different seasons—light cotton florals for spring, cozy flannels for fall, or festive prints for the holidays. The reversible feature allows you to enjoy two styles in one accessory, making it versatile and practical.
If you’re gifting the headband, think about packaging it in a handmade fabric pouch or tying it with a ribbon. Presentation adds to the charm of a handmade item and shows thoughtfulness.
With these finishing touches, your reversible headband becomes more than just a functional accessory—it becomes a personal statement and a showcase of your sewing and quilting skills.
FAQ – Reversible Fabric Headband Pattern – Quilt Pattern
1. Is the reversible headband suitable for beginners?
Yes, this is an excellent beginner project, especially for those wanting to practice quilting on a small scale.
2. What types of fabric work best?
Quilting cotton is ideal, but you can also use lightweight linen or blends for different textures and looks.
3. How do I make sure the headband fits well?
Measure your head circumference and adjust the elastic length to ensure a comfortable, snug fit without being too tight.
4. Can I wash the headband in a machine?
Yes, use a gentle cycle with mild detergent, and air-dry to preserve the fabric and elastic.
5. Do I need special quilting tools?
A rotary cutter, quilting ruler, and sewing machine are helpful, but you can also use basic sewing tools if that’s what you have.
6. Can I skip the quilting step?
Yes, but quilting adds durability and a unique texture that makes the headband more appealing.
Making a Reversible fabric headband pattern – Quilt Pattern is a fun and rewarding project that blends practicality with creativity. From selecting fabrics and quilting panels to sewing and adding personal touches, each step allows you to create a unique accessory that’s stylish and functional.
Whether you’re sewing for yourself or making gifts for friends, this headband is sure to impress. I hope this guide has inspired you to try your own version—please share your honest thoughts and suggestions so we can continue to improve and inspire other makers.