
The Pieceful Patchwork Wall Hanging – July – Quilt Pattern is a beautiful blend of creativity, tradition, and modern quilting artistry. This project captures the warmth and charm of a handmade quilt while transforming it into a stunning decorative piece for your walls. Perfect for celebrating the month of July, this pattern can be adapted to feature patriotic themes, summer florals, or any fabric combination that brings joy to your space. It’s a wonderful way to use your quilting skills to create something both functional and decorative.
Creating a Pieceful Patchwork Wall Hanging – July – Quilt Pattern allows you to explore different quilting techniques without committing to a large project. Because it’s smaller than a traditional bed quilt, you can focus on intricate patchwork designs, experiment with new color palettes, and practice advanced stitching methods in a manageable format. Whether you’re a seasoned quilter or just starting out, this wall hanging project offers a satisfying and creative experience from start to finish.
This wall hanging isn’t just about beauty—it’s also a great way to tell a story through fabric. The Pieceful Patchwork Wall Hanging – July – Quilt Pattern can be a tribute to special memories, a celebration of summer, or a piece that simply adds texture and warmth to your home. From fabric selection to final binding, each step of the process is an opportunity to create something truly personal and unique.
1. Choosing Fabrics and Colors for Your July Wall Hanging
Selecting the right fabrics is the first step in bringing your Pieceful Patchwork Wall Hanging – July – Quilt Pattern to life. Think about the mood and style you want to convey—bright and bold prints for a summer celebration, muted tones for a rustic farmhouse look, or even batiks for a more artistic approach.
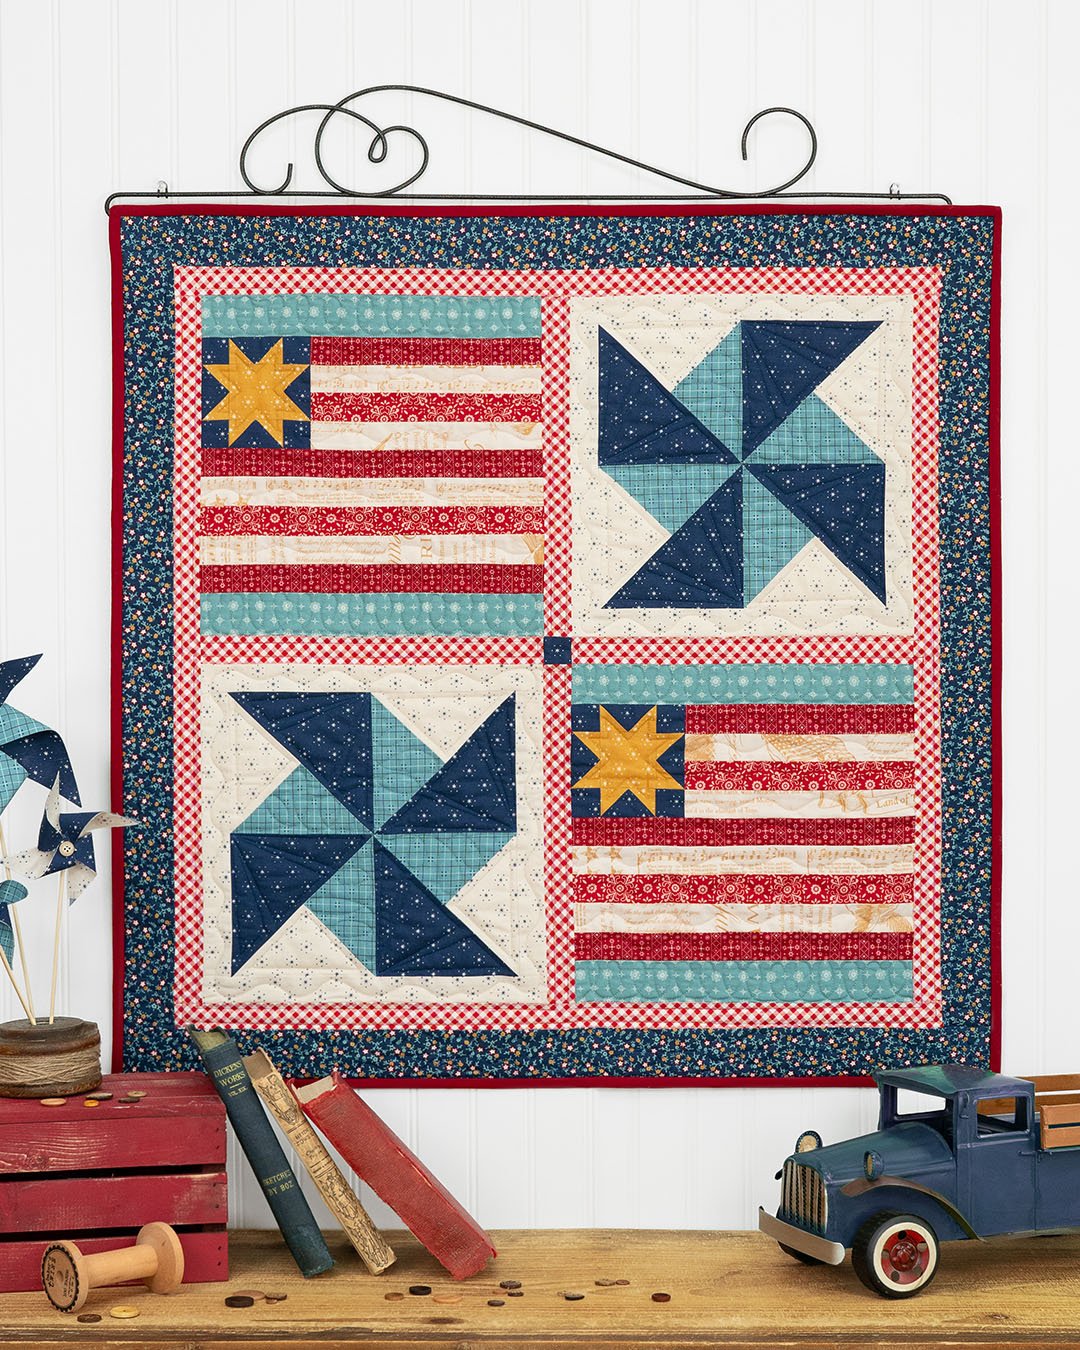
When choosing colors, consider using a combination of light, medium, and dark shades to create depth and contrast in your patchwork. For a July-themed wall hanging, reds, whites, and blues can evoke a festive feeling, while floral prints can highlight the beauty of summer.
High-quality quilting cotton is ideal for this project because it’s easy to work with, durable, and comes in endless designs. You may also want to incorporate specialty fabrics such as linen or metallic accents to add texture and interest.
Don’t forget about the background fabric—it should complement your patchwork without overpowering it. Neutral tones like cream, beige, or light gray often work well, allowing the main design to shine.
In addition to fabrics, think about the batting you’ll use. A lightweight cotton batting will keep the wall hanging flat and easy to display, while still adding enough body for quilting.
By investing time in carefully selecting your fabrics, you set the stage for a wall hanging that feels cohesive, vibrant, and true to your vision.
2. Planning and Piecing Your Patchwork Design
Once your fabric selection is complete, it’s time to plan the layout for your Pieceful Patchwork Wall Hanging – July – Quilt Pattern. Decide whether you want a traditional block arrangement, such as nine-patch or log cabin, or a more modern, improvisational design.
Sketching your layout on paper can help you visualize the final look and ensure your color distribution feels balanced. You can also use digital quilt design tools to experiment with different arrangements before cutting into your fabric.
When piecing the patchwork, accuracy is key. Use a rotary cutter, quilting ruler, and cutting mat to achieve precise pieces. Consistent seam allowances—usually ¼ inch—will help the blocks fit together perfectly.
Chain piecing, where you sew multiple units in a continuous sequence, can speed up the process and keep your pieces organized. Press your seams carefully, either open or to one side, to reduce bulk and improve the quilt’s appearance.
Once your patchwork blocks are assembled, join them into rows, then sew the rows together. Double-check that your points match and your quilt top is square before moving on.
This stage is where the vision for your wall hanging really starts to take shape, and it’s incredibly rewarding to see the design come together.
3. Quilting and Adding Texture
Quilting is where the Pieceful Patchwork Wall Hanging – July – Quilt Pattern transforms from flat fabric to a textured piece of art. The quilting stitches not only hold the layers together but also add dimension and character to the finished piece.
For a July-themed design, you might choose quilting patterns like stars, waves, or swirling lines that evoke the feeling of summer. Alternatively, simple straight-line quilting can give the piece a clean, modern look.
Basting the quilt layers—top, batting, and backing—securely is essential before you start quilting. Use safety pins, basting spray, or hand-basting stitches to keep everything in place.
If you’re new to quilting, a walking foot attachment can help feed the layers evenly through your sewing machine, preventing puckers and distortion. For more intricate designs, free-motion quilting allows you to create curves, loops, and custom motifs.
Remember to start quilting from the center of the piece and work outward. This helps prevent shifting and keeps the quilt square.
By the end of this step, your wall hanging will have a beautiful tactile quality that enhances the patchwork design and makes it visually engaging from every angle.
4. Finishing and Displaying Your Wall Hanging
Finishing the Pieceful Patchwork Wall Hanging – July – Quilt Pattern involves binding the edges and preparing it for display. The binding frames your quilt and gives it a polished, professional appearance.
Cut binding strips from your chosen fabric, sew them together, and attach them to the edges of your quilt using a ¼-inch seam. You can hand-stitch the binding to the back for an invisible finish or machine-stitch it for durability.
For wall hangings, you’ll need a method for hanging the piece securely. A simple sleeve sewn to the back of the quilt allows you to insert a rod or dowel, making it easy to hang without damaging the fabric.
Consider adding a quilt label to the back with your name, the date, and any special notes about the project. This is especially meaningful if the piece is a gift or part of a series.
Before hanging, give your quilt a final press to smooth any wrinkles. Ensure the wall space is clean and free from direct sunlight, which can fade fabrics over time.
Once displayed, your wall hanging will become a focal point in the room, adding warmth, texture, and a personal touch to your home decor.
FAQ – Pieceful Patchwork Wall Hanging – July – Quilt Pattern
1. Is this project beginner-friendly?
Yes, the Pieceful Patchwork Wall Hanging – July – Quilt Pattern is suitable for beginners, especially if you choose a simple block layout and straightforward quilting design.
2. What size should a wall hanging be?
Sizes vary, but most wall hangings measure between 18×24 inches and 36×36 inches, depending on the design and available wall space.
3. Do I need special tools to make this project?
Basic quilting tools like a rotary cutter, ruler, cutting mat, and sewing machine are recommended. A walking foot is helpful for quilting.
4. How do I keep the wall hanging from sagging over time?
Using a hanging sleeve with a sturdy dowel helps maintain the shape. Lightweight batting also prevents stretching.
5. Can I wash a quilted wall hanging?
Yes, but it’s best to wash gently in cold water and air dry to preserve the fabric colors and stitching.
6. How long does it take to complete?
Depending on the complexity of the design, this project can be finished in a few days to a week.
The Pieceful Patchwork Wall Hanging – July – Quilt Pattern is a delightful quilting project that blends artistry, craftsmanship, and personal expression. From selecting fabrics and piecing the patchwork to quilting, binding, and finally displaying it, each step allows you to create something beautiful and lasting.
Whether you’re making it to celebrate July, to match your home’s decor, or simply to enjoy the process of quilting, this project is as rewarding as it is decorative. I’d love to hear your honest thoughts and suggestions about this tutorial—your feedback helps inspire more creative quilting ideas for the future.