
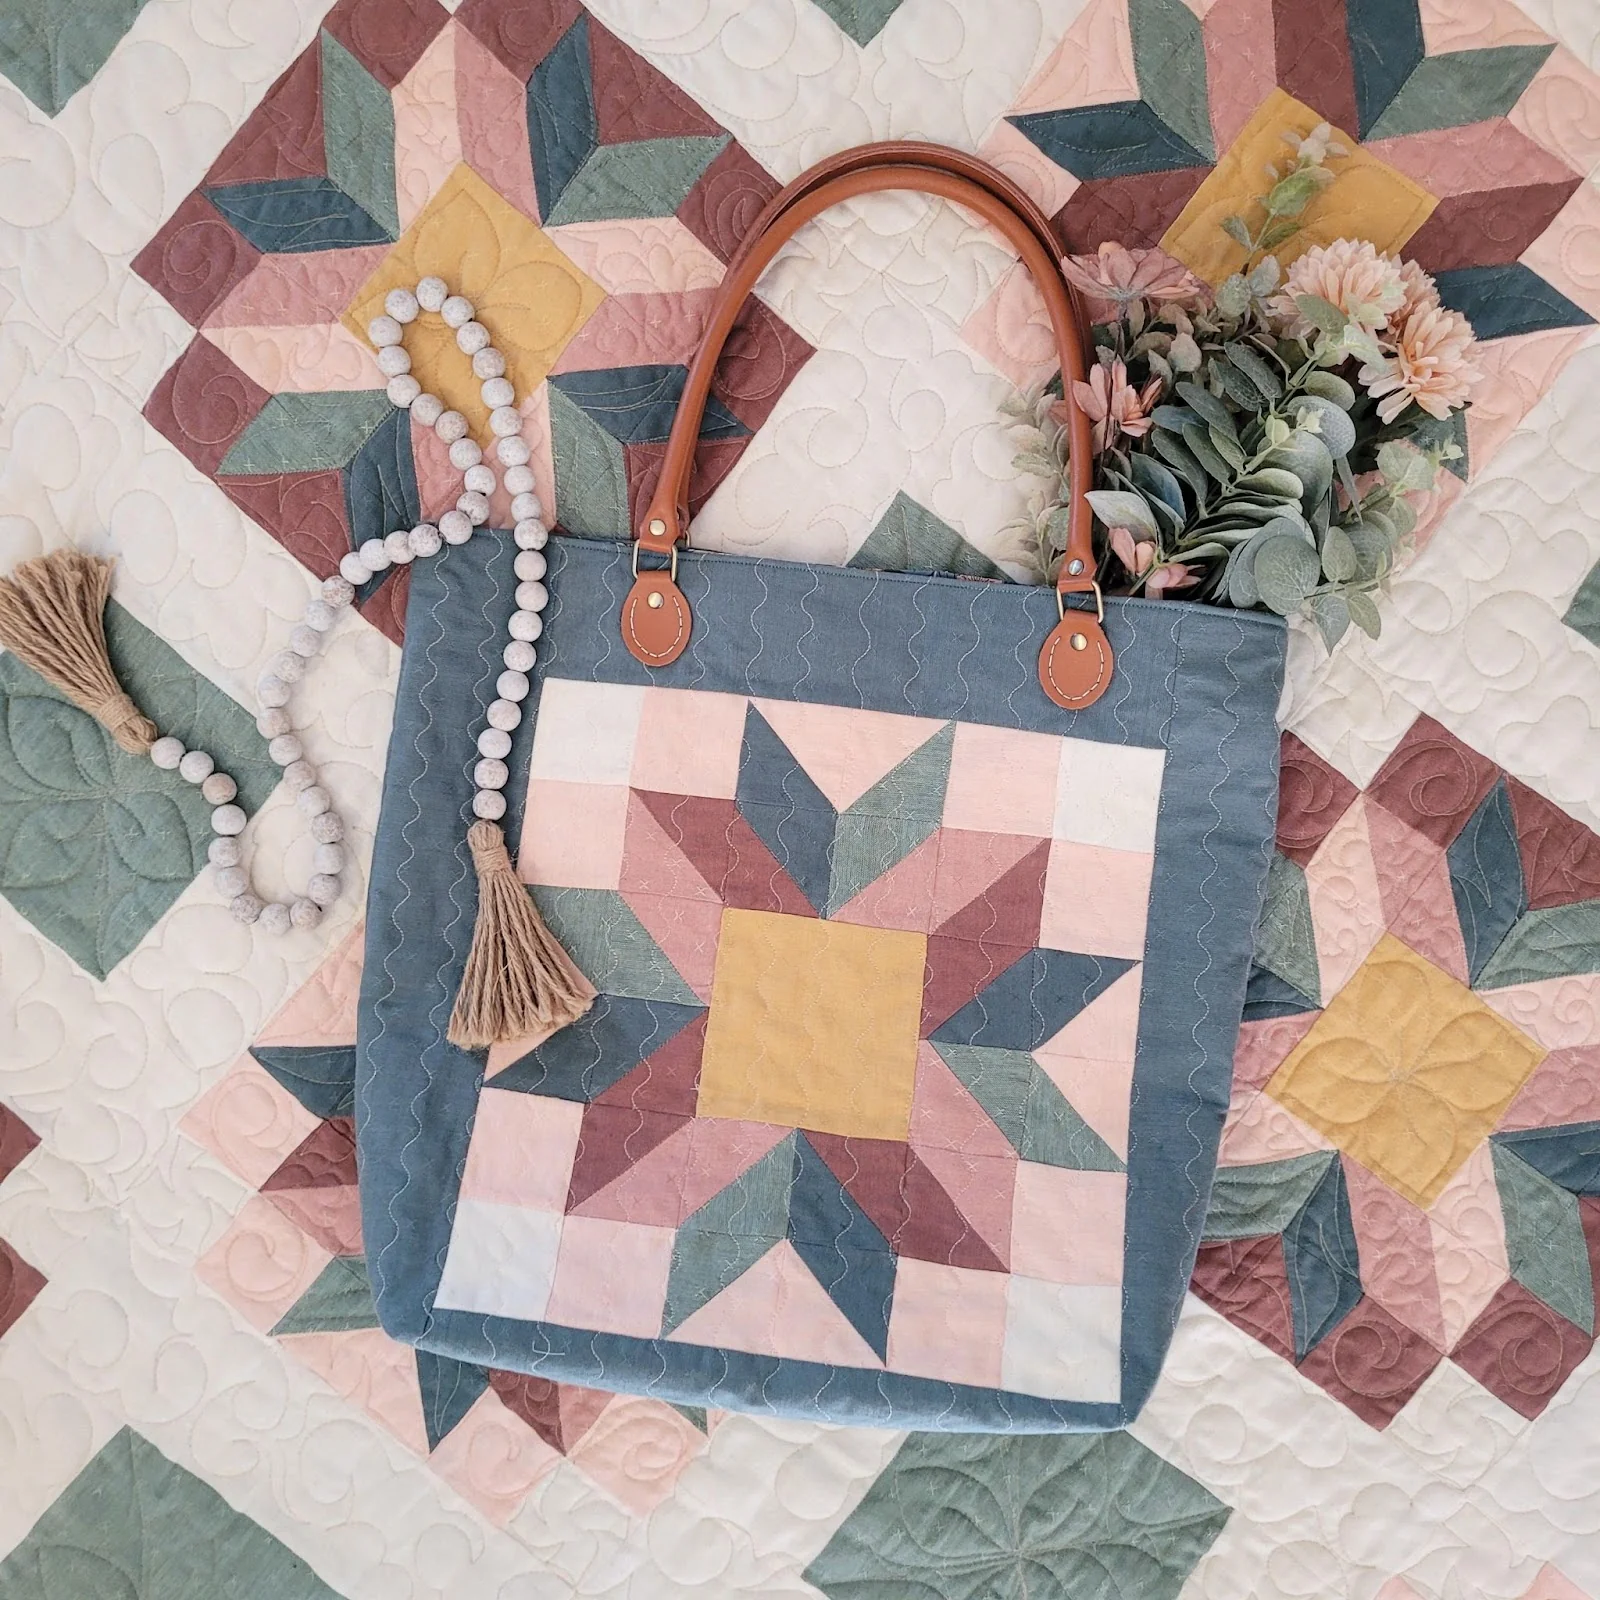
The Hope Blossoms Tote Bag Tutorial – Quilt Pattern is the perfect blend of creativity, practicality, and heartfelt design. This beautiful tote bag project is ideal for quilters and sewing enthusiasts who want to create something both functional and visually appealing. With its floral-inspired style and generous size, it’s a wonderful accessory for everyday use—whether you’re carrying books, groceries, or crafting supplies. The name “Hope Blossoms” also makes this project extra special, symbolizing positivity and growth, and making it an excellent gift for a loved one or a charity sewing initiative.
One of the best things about the Hope Blossoms Tote Bag Tutorial – Quilt Pattern is how versatile it can be. Depending on the fabrics you choose, you can create a bright, cheerful look for spring and summer or a warm, cozy design for autumn and winter. This adaptability ensures that the tote bag will match the style of the person using it, and because it’s handmade, each one is truly unique. The quilted design also adds an extra layer of durability, allowing the bag to maintain its shape and withstand daily use.
In this article, you’ll find step-by-step advice on how to choose fabrics, prepare your quilted panels, assemble your tote, and add those personal finishing touches that make your work stand out. The Hope Blossoms Tote Bag Tutorial – Quilt Pattern will guide you through the process in a way that’s approachable for beginners yet still satisfying for experienced quilters. By the end, you’ll not only have a stunning tote bag but also a deeper appreciation for the art of quilted accessories.
1. Selecting Fabrics and Materials for the Hope Blossoms Tote Bag
When beginning your Hope Blossoms Tote Bag Tutorial – Quilt Pattern, choosing the right fabrics is the foundation of your project. Quilting cotton is the most popular choice because it’s durable, easy to work with, and available in endless prints. For a cohesive look, select a floral or botanical print to capture the “blossoms” theme, then pair it with coordinating solids or subtle patterns.
Consider the weight of your fabrics. While quilting cotton works well for the outer layer, you might want to use a heavier fabric for the base or handles to ensure the bag can carry heavier items without sagging. Canvas or denim make excellent reinforcements.
The lining fabric should complement the outer design while being light enough to see inside the bag easily. Bright linings can add a fun surprise every time the tote is opened, while neutral tones create a calm, sophisticated feel.
Stabilizers or interfacing are essential for structure. Fusible fleece can give the bag a soft quilted feel while maintaining shape, whereas firm interfacing will create a sturdier tote perfect for carrying books or groceries.
Other materials you’ll need include strong thread, quilting rulers, a rotary cutter, and a reliable sewing machine. High-quality tools not only make the work easier but also help produce cleaner, more precise results.
Taking the time to gather the right materials ensures your tote bag will be both beautiful and practical, ready to become a favorite everyday accessory.
2. Preparing and Quilting the Panels
The next step in the Hope Blossoms Tote Bag Tutorial – Quilt Pattern is to prepare the quilted panels. Begin by cutting your outer fabric, lining, and batting or fusible fleece according to the pattern’s measurements. Be sure to cut accurately—precise measurements lead to a more professional-looking finished product.
Once your pieces are cut, layer the outer fabric on top of the batting, with the lining fabric on the back if you’re quilting through all layers. Alternatively, you can quilt just the outer layer and batting, then add the lining later in assembly.
Quilting is where you can add personality to your tote bag. Straight-line quilting is a classic choice that creates a clean, modern look. You can sew evenly spaced parallel lines, crosshatch patterns, or diagonal grids. If you want something more playful, free-motion quilting allows you to stitch swirls, flowers, or leaf designs that echo the “blossoms” theme.
Before quilting, baste your layers together using pins or temporary spray adhesive to prevent shifting. This is especially important for larger panels to maintain accuracy.
After quilting, trim the panels back to their original size, as quilting can sometimes distort the edges slightly. This step ensures they will align perfectly during assembly.
With your quilted panels ready, you have the sturdy, decorative foundation of your tote bag. Now you can move on to assembling the structure and creating a piece that’s both functional and visually stunning.
3. Assembling the Hope Blossoms Tote Bag
Assembly is where the Hope Blossoms Tote Bag Tutorial – Quilt Pattern comes to life. Start by preparing the handles. Cut two long strips of fabric or use pre-made webbing for added strength. If making fabric handles, press them in half lengthwise, then fold each side to the center and press again. Topstitch along both edges for durability.
Attach the handles to the right side of the outer panels, positioning them evenly so the bag hangs comfortably when carried. Make sure the handles are aligned and securely stitched, as they will bear the most weight.
Next, sew the side seams and bottom of the outer bag, right sides together. Press the seams open for a neater finish. Repeat the same process for the lining but leave a small opening at the bottom for turning the bag later.
If you want a flat base that allows the tote to stand upright, create boxed corners by marking and stitching across each bottom corner, then trimming off the excess fabric. This technique adds both style and function.
Once the outer bag and lining are complete, place them right sides together, matching side seams. Sew around the top edge, ensuring the handles are sandwiched between the layers.
Turn the bag right side out through the opening in the lining, then stitch the opening closed. Finally, press the top edge and topstitch for a polished look. At this point, your tote is structurally complete and ready for finishing touches.
4. Adding Personal Touches and Final Details
The finishing stage of the Hope Blossoms Tote Bag Tutorial – Quilt Pattern is your opportunity to make the tote truly one-of-a-kind. Simple embellishments can elevate the look and add charm.
Consider adding appliqué flowers, embroidery, or decorative stitching to the outer panels. These touches can highlight the floral theme and give the bag a handcrafted elegance that store-bought items can’t match.
You might also choose to line the inside with pockets—perfect for keeping keys, a phone, or small essentials organized. A zippered pocket adds extra security for valuables.
Decorative trims, lace, or even fabric-covered buttons can be sewn onto the bag for additional personality. For a modern twist, try leather handles or metallic hardware.
If the bag is a gift, personalize it with the recipient’s initials, either through embroidery or a custom label. Handmade labels with your name or logo can also be a nice finishing touch for those who sell their creations.
Finally, give the tote a good press to smooth out any wrinkles and make the seams crisp. A well-pressed bag not only looks professional but also feels sturdier in hand.
By taking time with these last steps, you ensure your Hope Blossoms Tote Bag Tutorial – Quilt Pattern results in a creation you can be proud of—both beautiful and practical for everyday use.
FAQ – Hope Blossoms Tote Bag Tutorial – Quilt Pattern
1. Is this project beginner-friendly?
Yes! With clear instructions and basic sewing skills, beginners can complete the Hope Blossoms Tote Bag Tutorial – Quilt Pattern successfully.
2. What type of fabric is best for this tote?
Quilting cotton is the most common choice, but canvas or denim can be used for a sturdier bag.
3. How do I make the bag more structured?
Adding fusible fleece or firm interfacing will help the bag hold its shape.
4. Can I change the size of the tote?
Absolutely! Adjust the panel measurements to create a larger or smaller version while following the same construction steps.
5. How long does it take to make?
Depending on quilting complexity and embellishments, the project can take anywhere from a few hours to a weekend.
6. Can I wash the tote bag?
Yes, but use gentle cycles and mild detergent, especially if the bag has delicate embellishments.
The Hope Blossoms Tote Bag Tutorial – Quilt Pattern is a delightful project that allows you to combine quilting artistry with practical sewing. From fabric selection to quilting, assembly, and personalization, each step offers a chance to express your creativity while making something useful. Whether you keep it for yourself or give it as a thoughtful handmade gift, this tote is sure to bring joy.
I hope this guide has inspired you to start your own version—please share your honest opinion and suggestions so we can continue creating and improving together.