
If you’ve ever wondered how to create a practical yet beautiful fabric organizer basket step by step – quilt pattern, you’re in the right place. This delightful project combines functionality and charm, giving you a perfect storage solution for your craft room, bathroom, or kids’ area. Whether you’re organizing fabric scraps, yarns, toys, or office supplies, this quilted basket brings color and order to any space.
In this guide, you’ll learn how to make a fabric organizer basket step by step – quilt pattern, with easy-to-follow instructions suitable for beginners and experienced quilters alike. You don’t need advanced sewing skills—just some fabric, batting, basic tools, and a little creativity. This project allows you to explore simple quilting techniques while creating something incredibly useful and decorative.
Throughout this article, we’ll highlight essential quilt pattern techniques, key materials, and creative customization tips to make your fabric organizer basket truly unique. So grab your sewing supplies and let’s dive into this practical and fun quilting journey together.
1. Choosing the Right Materials for Your Organizer Basket
To begin your fabric organizer basket step by step – quilt pattern, you’ll need to gather the right materials. Selecting quality fabric is essential for durability and aesthetic appeal. Cotton quilting fabric is a great choice, as it’s easy to sew, sturdy, and available in a wide variety of prints and colors.
You’ll also need batting to give the organizer basket structure and stability. Cotton or polyester batting works well, depending on how stiff or soft you want your basket to be. Some quilters prefer fusible foam for extra firmness.
Make sure you have a cutting mat, rotary cutter, quilting ruler, and quality thread. These tools will help you achieve clean lines and professional results. Don’t forget coordinating lining fabric to give the inside of your basket a polished look.
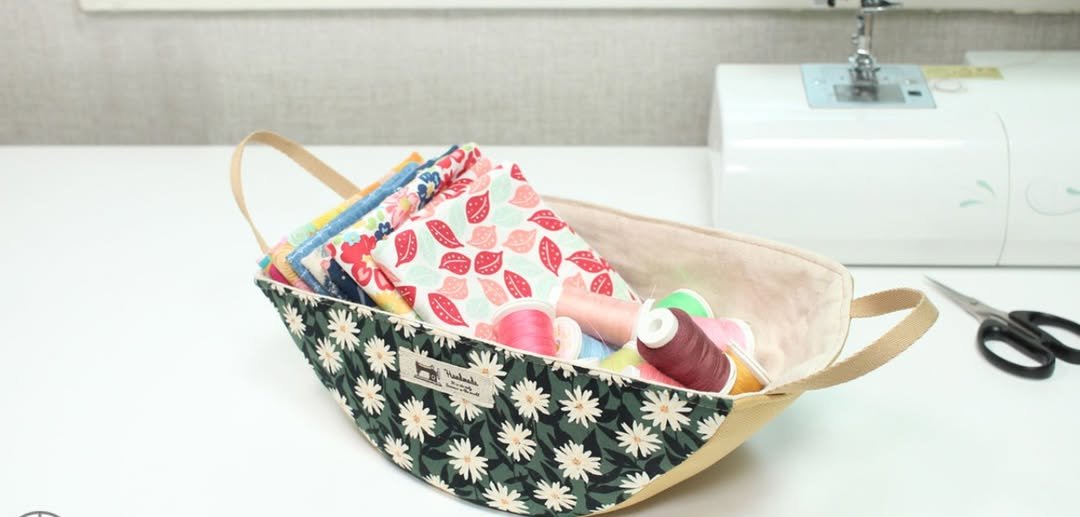
If you plan to add handles, consider using interfaced fabric strips or cotton webbing. Handles make your organizer basket more functional, especially if you’ll be moving it around often.
For beginners, solid fabrics may be easier to work with than prints. However, if you enjoy mixing patterns, have fun combining contrasting or complementary designs for a lively effect.
Take your time selecting each material—you want your finished quilt pattern project to be as beautiful as it is useful. Now that you have your supplies, it’s time to start creating!
2. Cutting and Quilting Your Fabric Pieces
Begin your fabric organizer basket step by step – quilt pattern by cutting all necessary pieces. Typically, you’ll need a front, back, two sides, a bottom, and corresponding lining pieces. Cut each one with precision, following your desired measurements.
Next, layer the outer fabric pieces with batting and quilt them together. This is where you can get creative with stitching patterns—straight lines, diagonal grids, or free-motion designs all work beautifully.
Use a walking foot for your sewing machine to help layers feed evenly. Pin or baste the layers before quilting to prevent shifting during sewing.
Take your time quilting each piece individually. This method helps maintain neat lines and consistent structure throughout the project. It’s a satisfying process that adds texture and visual interest.
After quilting, trim each piece back to the correct size, removing any uneven edges caused by quilting shrinkage. Clean edges ensure smooth seams when assembling your basket.
Be sure to repeat the quilting process for your lining pieces if you want extra stability. Some makers prefer unquilted linings for a softer interior feel—it’s entirely up to you.
3. Assembling the Organizer Basket Structure
Now that all pieces are quilted, it’s time to bring your fabric organizer basket step by step – quilt pattern to life by assembling the structure. Begin by sewing the sides of the outer basket together, one panel at a time, using a ¼-inch seam allowance.
Attach the front and back panels next, carefully aligning all edges. Use clips instead of pins if you’re working with thicker batting or foam, as they hold the layers better without distortion.
Sew the bottom panel last, matching the sides carefully to create a sturdy base. Turn the outer basket right side out and check the seams for accuracy.
Repeat this process for the lining, but leave a small opening at the bottom seam. This gap will be used later to turn the entire basket right side out.
Once both the outer basket and lining are assembled, insert the outer basket inside the lining, right sides together. Align all top edges and sew around the rim, securing both layers.
Turn the basket right side out through the opening in the lining. Close the opening with a ladder stitch or by sewing close to the edge with your machine. Push the lining into the basket and press the top edge flat.
Topstitch around the upper edge of the basket for a neat finish. This extra step gives your quilt pattern a professional touch and reinforces the rim.
4. Adding Finishing Touches and Custom Details
With the structure complete, it’s time to personalize your fabric organizer basket step by step – quilt pattern with finishing touches. One of the most practical additions is handles. Sew fabric strips, reinforced with interfacing, to the sides, or use sturdy cotton webbing for a classic look.
Decorative labels, tags, or even hand embroidery can make your basket unique. Use alphabet appliqué to label what the basket will hold—“yarn,” “toys,” “scraps,” and so on.
Consider adding pockets to the inside or outside. Slip pockets are perfect for small accessories like scissors, measuring tape, or markers.
You can also play with height and width. Shorter baskets are ideal for drawer organizers, while taller versions are great for freestanding storage.
Another fun option is making a set of nesting baskets in various sizes. Using the same fabric collection keeps them coordinated while adding organization versatility.
Don’t forget to showcase your finished basket in your home! It’s not just a storage solution—it’s a handmade piece of textile art and a wonderful expression of your quilting creativity.
Frequently Asked Questions (FAQ)
What is the best fabric for a fabric organizer basket?
The best choice is 100% cotton quilting fabric. It’s easy to sew, comes in endless prints, and offers the durability needed for everyday use.
Do I need a sewing machine for this quilt pattern?
Yes, a sewing machine is recommended for accurate stitching and quilting. Hand sewing is possible but more time-consuming and may not offer the same durability.
Can I wash the organizer basket after it’s finished?
Yes, but it’s best to wash gently, by hand or on a delicate cycle, especially if you’ve used interfacing or batting. Let it air dry to maintain its shape.
How do I make the basket sturdier?
Use fusible foam or multiple layers of batting, and choose a tighter quilting pattern. Also, topstitching around the top edge adds strength and structure.
Is this a good beginner quilting project?
Absolutely! This fabric organizer basket step by step – quilt pattern is perfect for beginners. It teaches basic cutting, quilting, and assembly techniques in a manageable size.
Can I change the dimensions of the basket?
Yes! You can adjust height, width, and depth to suit your storage needs. Just be sure to update all corresponding fabric and lining measurements.
Creating your own fabric organizer basket step by step – quilt pattern is a satisfying and practical sewing project that blends beauty with purpose. From selecting the perfect fabrics to quilting and assembling each part, you’ve learned how to turn simple materials into a stylish and functional storage piece.
Whether you’re new to quilting or looking for a quick weekend project, this basket is a wonderful way to use your creativity. Plus, you can personalize it to match your home decor or gift it to friends and family.
I hope this tutorial has inspired you to pick up your fabrics and start stitching today. If you made your own organizer basket, I’d love to hear about it! Please share your thoughts, experiences, or suggestions in the comments—your feedback means a lot and helps us keep improving.