
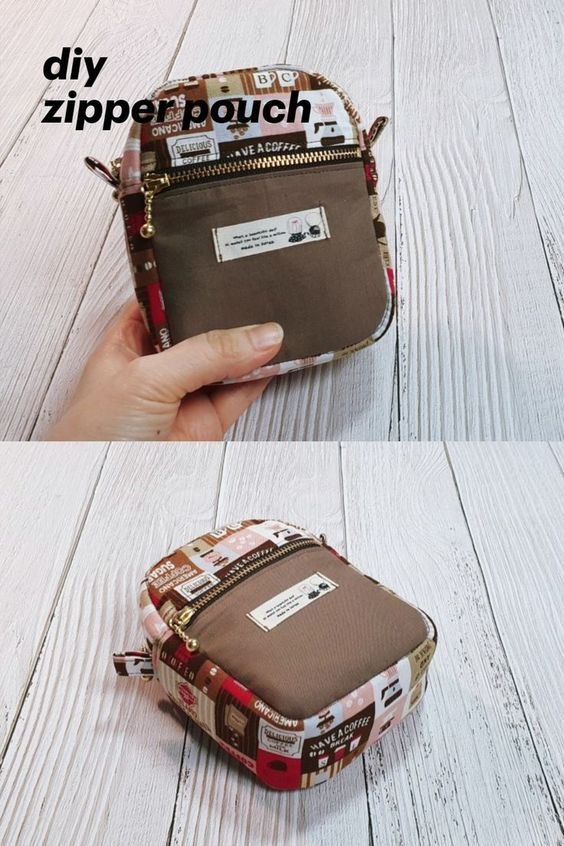
The Cute makeup bag /double zipper pouch/ – Quilt Pattern is the perfect combination of style, practicality, and creativity. Whether you are a beginner quilter or an experienced sewing enthusiast, this project offers an exciting opportunity to make a functional accessory that also reflects your personal taste. With its charming design and two separate compartments, it provides excellent storage space for cosmetics, toiletries, or even small sewing notions, while showcasing the beauty of quilted fabric. This project blends the joy of quilting with the satisfaction of creating something useful for daily life.
The Cute makeup bag /double zipper pouch/ – Quilt Pattern is a versatile design that can be customized with different colors, patterns, and quilting techniques. You can create a playful look with bright fabrics, go for an elegant style with muted tones, or even make a seasonal version for gifts. The double zipper feature makes it even more practical, allowing you to separate items neatly, which is a huge plus for staying organized. This sewing project is not only fun to make but also an ideal handmade gift that people will truly appreciate.
In this article, we’ll explore the best techniques, tips, and ideas for making your own Cute makeup bag /double zipper pouch/ – Quilt Pattern. You’ll learn how to choose fabrics, cut and piece your quilt top, sew the double zipper construction, and finish the bag so it looks professional. By the end, you’ll have all the knowledge you need to start creating your own personalized quilted pouches with confidence.
1. Choosing Fabrics and Materials for Your Cute Makeup Bag
When starting your Cute makeup bag /double zipper pouch/ – Quilt Pattern, fabric choice is one of the most important steps. The fabrics you select will determine the style, durability, and overall appeal of the finished pouch. Quilting cotton is a popular choice because it’s easy to work with and comes in countless prints and colors.
Consider using two or three coordinating fabrics to make the pouch visually interesting. You might choose a floral for the main body, a solid color for the zipper section, and a contrasting print for the lining. This combination helps highlight the double zipper detail and gives the pouch a professional finish.
For added structure, you’ll want to use interfacing or fusible fleece. These materials add body to the bag, ensuring it holds its shape even when empty. They also help protect the items inside by providing a bit of padding.
The zippers themselves are a key feature. Opt for high-quality zippers that glide smoothly and match or complement your fabric colors. Since the pouch has two zippers, you can play with contrasting colors to make the design pop.
Finally, gather essential sewing tools like a rotary cutter, cutting mat, quilting ruler, and matching thread. These tools will make the process faster and ensure clean, precise results.
By carefully selecting fabrics, zippers, and stabilizing materials, you’re setting a solid foundation for a high-quality quilted pouch you’ll be proud to use or give as a gift.
2. Cutting and Piecing the Quilt Panels
The Cute makeup bag /double zipper pouch/ – Quilt Pattern begins with cutting your fabrics into the required shapes and sizes. Precision is key here, as even small differences can affect how the bag comes together. Use your quilting ruler and rotary cutter for the best accuracy.
Most designs will require a quilted front and back panel, plus fabric pieces for the sides, base, and lining. Depending on your chosen size, you can adapt the measurements to suit your needs. Remember to cut your interfacing or fusible fleece to match the outer fabric pieces.
Once you have all your pieces, the next step is piecing the quilt top. This is where you can get creative—arrange fabric strips, squares, or even small quilt blocks into a layout you love. Sew them together with a ¼-inch seam allowance for neat, even seams.
After piecing, press the seams open or to one side, depending on your preference. Good pressing habits help the finished bag look more professional and make the quilting stage easier.
Baste the quilt top to your batting or fusible fleece, then add the lining fabric. You can secure the layers using safety pins or temporary adhesive spray before quilting.
Quilting the panels not only adds texture and style but also reinforces the fabric, making your pouch more durable. You can choose straight-line quilting for a modern look or free-motion quilting for a more decorative effect.
By completing this stage with care, you’ll have sturdy, beautiful panels ready for the zipper installation and assembly process.
3. Installing the Double Zippers
The double zipper design is the defining feature of the Cute makeup bag /double zipper pouch/ – Quilt Pattern. While it may seem intimidating at first, it’s actually a straightforward process with the right approach.
Start by sewing the first zipper to the top edge of one quilted panel and its corresponding lining piece. Use a zipper foot to get close to the zipper teeth without catching them. Once attached, press the fabric away from the zipper for a neat finish.
Repeat the process for the second zipper on the other panel. The key is ensuring both zippers are aligned evenly so the pouch opens smoothly from either side.
After sewing both zippers, you’ll join the panels together along the sides and bottom. This is where the design creates two separate compartments—each with its own zipper access.
If you want an even more polished look, consider adding zipper tabs at both ends of each zipper. This helps avoid bulky seams and gives the pouch a clean, finished appearance.
Installing two zippers in one pouch might require patience, but the result is incredibly functional. It allows you to keep cosmetics in one section and other essentials, like brushes or small tools, in another, all while maintaining a compact and portable design.
Once the zippers are installed, you’re ready to finish assembling the bag by sewing the lining and outer panels together.
4. Finishing Touches and Personalization
The final stage of making your Cute makeup bag /double zipper pouch/ – Quilt Pattern is all about details and personalization. This is where you can truly make the pouch your own.
Start by turning the bag right side out through the lining opening and pressing it carefully to shape the corners. A good press will give the bag a crisp, professional finish.
You can add decorative elements like fabric appliqués, embroidery, or even hand-stitched quilting motifs to enhance the design. These small touches can transform a simple pouch into a statement accessory.
If you’re making the pouch as a gift, consider using fabrics in the recipient’s favorite colors or patterns. You can also add a custom fabric label or a small charm to the zipper pull for a personal touch.
Another option is to vary the quilting style—diagonal lines, chevrons, or even playful swirls can completely change the look of the bag. This versatility makes the pattern suitable for multiple projects without feeling repetitive.
Finally, don’t forget to check all seams for strength, especially around the zippers. Reinforcing these areas will help the pouch last longer and withstand daily use.
With these finishing touches, your pouch will be both beautiful and functional—a true showcase of your quilting and sewing skills.
FAQ – Cute Makeup Bag /Double Zipper Pouch/ – Quilt Pattern
1. Is this project suitable for beginners?
Yes, with clear instructions and patience, beginners can successfully make a Cute makeup bag /double zipper pouch/ – Quilt Pattern, especially if they have basic sewing experience.
2. What fabrics work best for this pouch?
Quilting cotton is ideal, but you can also use canvas, denim, or other medium-weight fabrics for added durability.
3. Do I need a special sewing machine for quilting?
No, a regular domestic sewing machine with a quilting or walking foot attachment works perfectly for this project.
4. How can I make the pouch sturdier?
Using interfacing or fusible fleece will give the bag structure and help it maintain its shape.
5. Can I adjust the size of the pouch?
Yes, you can modify the measurements to make a smaller or larger version without affecting the overall design.
6. How long does it take to complete one pouch?
For most sewists, this project can be completed in a few hours, depending on quilting complexity and embellishments.
PATTERN HERE
Creating a Cute makeup bag /double zipper pouch/ – Quilt Pattern is a rewarding sewing project that combines creativity, functionality, and style. From choosing fabrics to quilting panels, installing double zippers, and adding personalized touches, each step allows you to showcase your skills while making something practical for everyday use. Whether for personal use or as a thoughtful handmade gift, this quilted pouch is sure to be appreciated. I hope this guide has inspired you to start your own version—please share your honest opinions and suggestions so we can continue improving and inspiring fellow makers.