
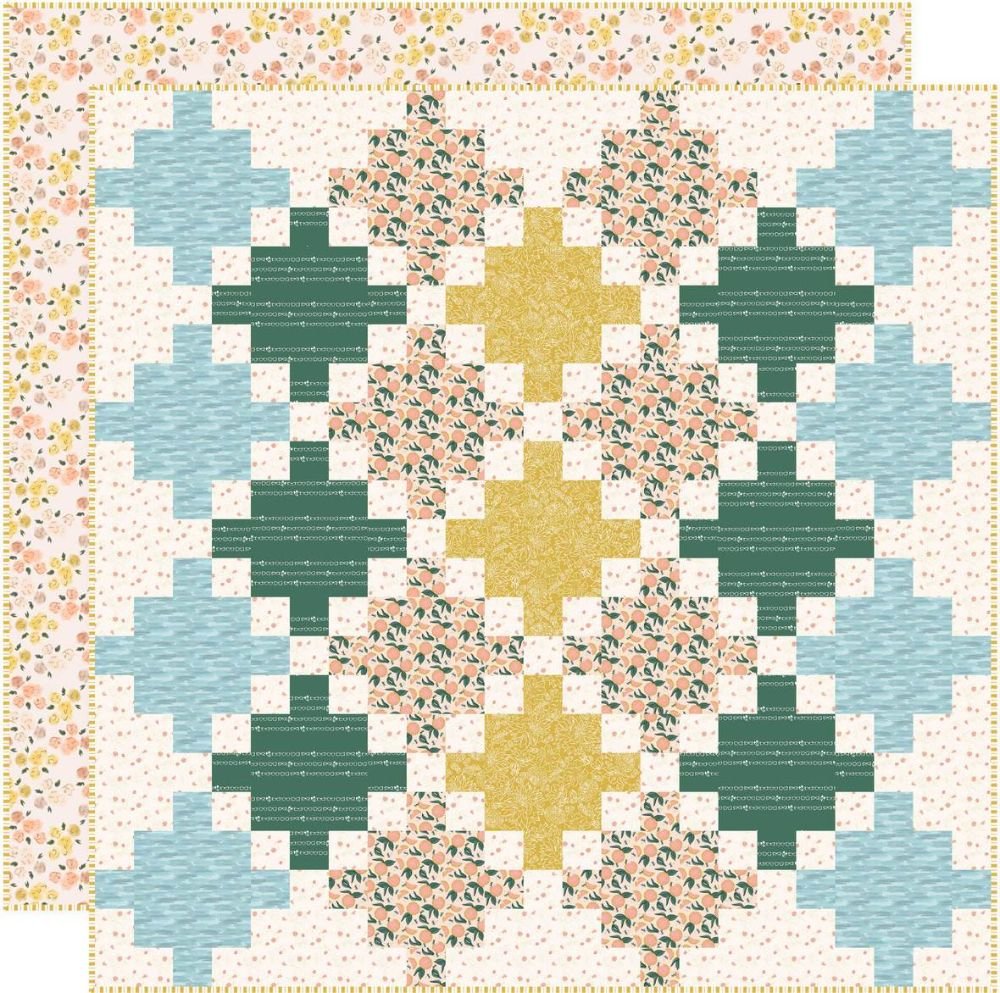
Celtic Crossing – Quilt Pattern is a timeless and visually striking design that continues to inspire quilters around the world. The Celtic Crossing – Quilt Pattern combines traditional influences with modern precision, creating a quilt block that feels both historic and fresh. From its interwoven paths to its balanced symmetry, this pattern tells a story through fabric and color.
For many quilters, working with the Celtic Crossing – Quilt Pattern is not only about sewing pieces together but also about connecting with a design that symbolizes unity, movement, and craftsmanship. Whether you are an experienced quilter or someone exploring advanced blocks, this pattern offers a rewarding creative journey.
In this article, you will learn everything you need to know about the Celtic Crossing – Quilt Pattern, including its construction principles, fabric choices, layout ideas, and finishing techniques. Each section is designed to guide you step by step while keeping the process enjoyable and approachable.
1. Understanding the Structure of the Celtic Crossing – Quilt Pattern
The Celtic Crossing – Quilt Pattern is known for its interlaced appearance, which creates the illusion of woven paths crossing over and under each other. This visual effect is achieved through precise piecing and thoughtful color placement rather than complex curves.
At its core, the pattern relies on geometric shapes such as squares, rectangles, and angled pieces. These shapes come together in a way that forms continuous lines, giving the quilt its signature Celtic-inspired look.
One of the most important aspects of the Celtic Crossing – Quilt Pattern is accuracy. Clean cuts and consistent seam allowances are essential to ensure that the crossing lines align perfectly across the block.
Despite its intricate appearance, the construction process can be broken down into manageable steps. Many quilters find that working methodically makes the pattern far less intimidating than it first appears.
Color contrast plays a vital role in highlighting the crossing paths. Choosing fabrics with clear differences in value helps define the woven effect and prevents the design from looking flat.
By understanding the structure of the Celtic Crossing – Quilt Pattern, you build a strong foundation that makes the rest of the quilting process smoother and more enjoyable.
2. Fabric Selection and Color Planning for Celtic Crossing – Quilt Pattern
Choosing the right fabrics is essential when working with the Celtic Crossing – Quilt Pattern. The design relies heavily on contrast, so selecting fabrics that stand out from one another is key to achieving a crisp and readable pattern.
Many quilters prefer solid or near-solid fabrics for this pattern. These fabrics help emphasize the clean lines and prevent busy prints from distracting from the crossing design.
Color planning is where creativity truly shines in the Celtic Crossing – Quilt Pattern. Traditional versions often use deep greens, blues, and neutrals, reflecting classic Celtic themes, but modern interpretations can include bright or unexpected color palettes.
Value contrast is more important than color choice alone. Even if you prefer subtle tones, make sure there is enough light and dark variation to clearly define the crossing paths.
Background fabric selection also deserves careful thought. A calm, neutral background allows the crossing elements to stand out, enhancing the overall visual impact of the quilt.
Taking time to plan fabric placement before sewing helps prevent mistakes and ensures that the final Celtic Crossing – Quilt Pattern looks balanced and intentional.
3. Piecing Techniques Used in the Celtic Crossing – Quilt Pattern
Precision piecing is the heart of the Celtic Crossing – Quilt Pattern. Accurate cutting and consistent seam allowances help ensure that all intersections line up correctly across the block.
Many quilters use strip piecing techniques to simplify the construction process. This method allows you to sew long fabric strips together and then cut them into segments, saving time and improving accuracy.
Pressing seams carefully is another essential step. Pressing consistently in the same direction reduces bulk and helps seams nest together smoothly when blocks are joined.
The Celtic Crossing – Quilt Pattern often includes angled seams that require special attention. Taking time to align edges properly before stitching prevents distortion and keeps the block square.
Using pins or fabric clips can be especially helpful when working with intersections. These tools hold pieces in place and help maintain alignment throughout sewing.
With patience and attention to detail, the piecing process becomes a satisfying experience that brings the Celtic Crossing – Quilt Pattern to life.
4. Finishing and Displaying Your Celtic Crossing – Quilt Pattern
Once all blocks of the Celtic Crossing – Quilt Pattern are completed, assembling the quilt top is an exciting step. Laying out the blocks before sewing allows you to preview the overall design and make adjustments if needed.
Joining rows carefully ensures that the crossing lines continue smoothly from block to block. Matching seams at intersections helps maintain the woven illusion throughout the quilt.
Quilting choices can enhance the beauty of the Celtic Crossing – Quilt Pattern. Simple straight-line quilting emphasizes the geometry, while gentle curves can soften the design and add texture.
Binding selection should complement the quilt without overpowering it. A solid binding often works well, framing the design and giving it a polished finish.
After binding, a final press gives the quilt a clean and professional appearance. This step highlights the crisp lines that define the Celtic Crossing – Quilt Pattern.
Whether displayed on a bed, wall, or gifted to someone special, a finished Celtic Crossing – Quilt Pattern quilt is a lasting piece of textile art.
Frequently Asked Questions About Celtic Crossing – Quilt Pattern
What skill level is needed for the Celtic Crossing – Quilt Pattern?
The Celtic Crossing – Quilt Pattern is best suited for confident beginners to intermediate quilters who are comfortable with accurate cutting and piecing.
Can beginners try the Celtic Crossing – Quilt Pattern?
Yes, beginners can attempt this pattern if they work slowly, follow measurements carefully, and practice precision piecing techniques.
What fabrics work best for the Celtic Crossing – Quilt Pattern?
Solid or lightly textured fabrics with strong contrast are ideal for highlighting the crossing design.
How large can a Celtic Crossing – Quilt Pattern quilt be?
The pattern is versatile and can be scaled to create small wall hangings, lap quilts, or full-size bed quilts.
Does the Celtic Crossing – Quilt Pattern require special tools?
Basic quilting tools such as a rotary cutter, ruler, and cutting mat are sufficient for this pattern.
How long does it take to complete a Celtic Crossing – Quilt Pattern?
The time required depends on quilt size and experience level, but most quilters complete it over several focused sewing sessions.
The Celtic Crossing – Quilt Pattern is a beautiful blend of tradition, geometry, and creativity. Throughout this article, you learned how the pattern is structured, how to choose fabrics and colors, which piecing techniques ensure success, and how to finish the quilt with confidence.
By understanding each step and working with care, the Celtic Crossing – Quilt Pattern becomes an enjoyable and rewarding project that showcases both skill and artistic expression. Whether you are creating it for yourself or as a meaningful gift, this pattern remains a timeless choice in the world of quilting.