
The Butterfly crochet tutorial – Crochet Pattern is a delightful and creative project that blends the beauty of nature with the relaxing art of crochet. This pattern allows you to make charming butterfly motifs that can be used in countless ways—whether as stand-alone decorations, appliqués for blankets, embellishments for clothing, or even as part of a larger crochet project. Perfect for both beginners and experienced crocheters, this tutorial offers step-by-step guidance to create elegant and colorful butterflies with ease.
One of the greatest things about the Butterfly crochet tutorial – Crochet Pattern is how versatile and customizable it is. You can experiment with different yarn colors to mimic realistic butterfly species or invent entirely new color combinations for a whimsical effect. The pattern itself is quite simple, relying on basic stitches like chains, single crochet, double crochet, and slip stitches, making it accessible even for those new to the craft. With just a small amount of yarn, you can create something delicate and eye-catching.
Another benefit of making crochet butterflies is their quick completion time. Unlike larger projects, a single butterfly can often be finished in less than an hour, making them perfect for last-minute gifts or craft fairs. They also provide a wonderful way to use up leftover yarn from other projects. Whether you want to decorate a nursery, add flair to a summer outfit, or craft a themed garland, this Butterfly crochet tutorial – Crochet Pattern gives you the skills to make it happen beautifully.
1. Materials and Tools Needed for the Butterfly Crochet Tutorial – Crochet Pattern
To create your Butterfly crochet tutorial – Crochet Pattern, having the right materials is the first step to success. Luckily, this project doesn’t require a lot of supplies, and most of what you need may already be in your crochet kit.
First, choose your yarn. For small, decorative butterflies, lightweight yarns like cotton or acrylic in DK or sport weight work perfectly. These yarns allow for intricate details while keeping the butterfly’s structure light and delicate. You can also use variegated yarn for a unique multi-tone effect without switching colors mid-project.
Next, you will need a crochet hook that matches your yarn weight. For DK or sport yarn, a 3.0mm to 4.0mm hook is ideal, while for heavier yarns, a 4.5mm to 5.5mm hook works better. Using the correct hook size ensures your stitches are neat and your butterfly holds its shape.
You’ll also want a yarn needle for weaving in ends and adding any finishing touches, such as sewing the butterfly onto another project. A pair of sharp scissors will help with clean cuts, and optional stitch markers can keep you on track with stitch counts.
Color selection is key when making crochet butterflies. Bright, bold colors create an eye-catching design, while softer pastels work beautifully for baby items and subtle decorations. You can even mix metallic threads with standard yarn for a shimmering effect.
Finally, prepare a comfortable, well-lit workspace. This will make it easier to see your stitches clearly and enjoy the process without straining your eyes.
2. Step-by-Step Instructions for the Butterfly Crochet Tutorial – Crochet Pattern
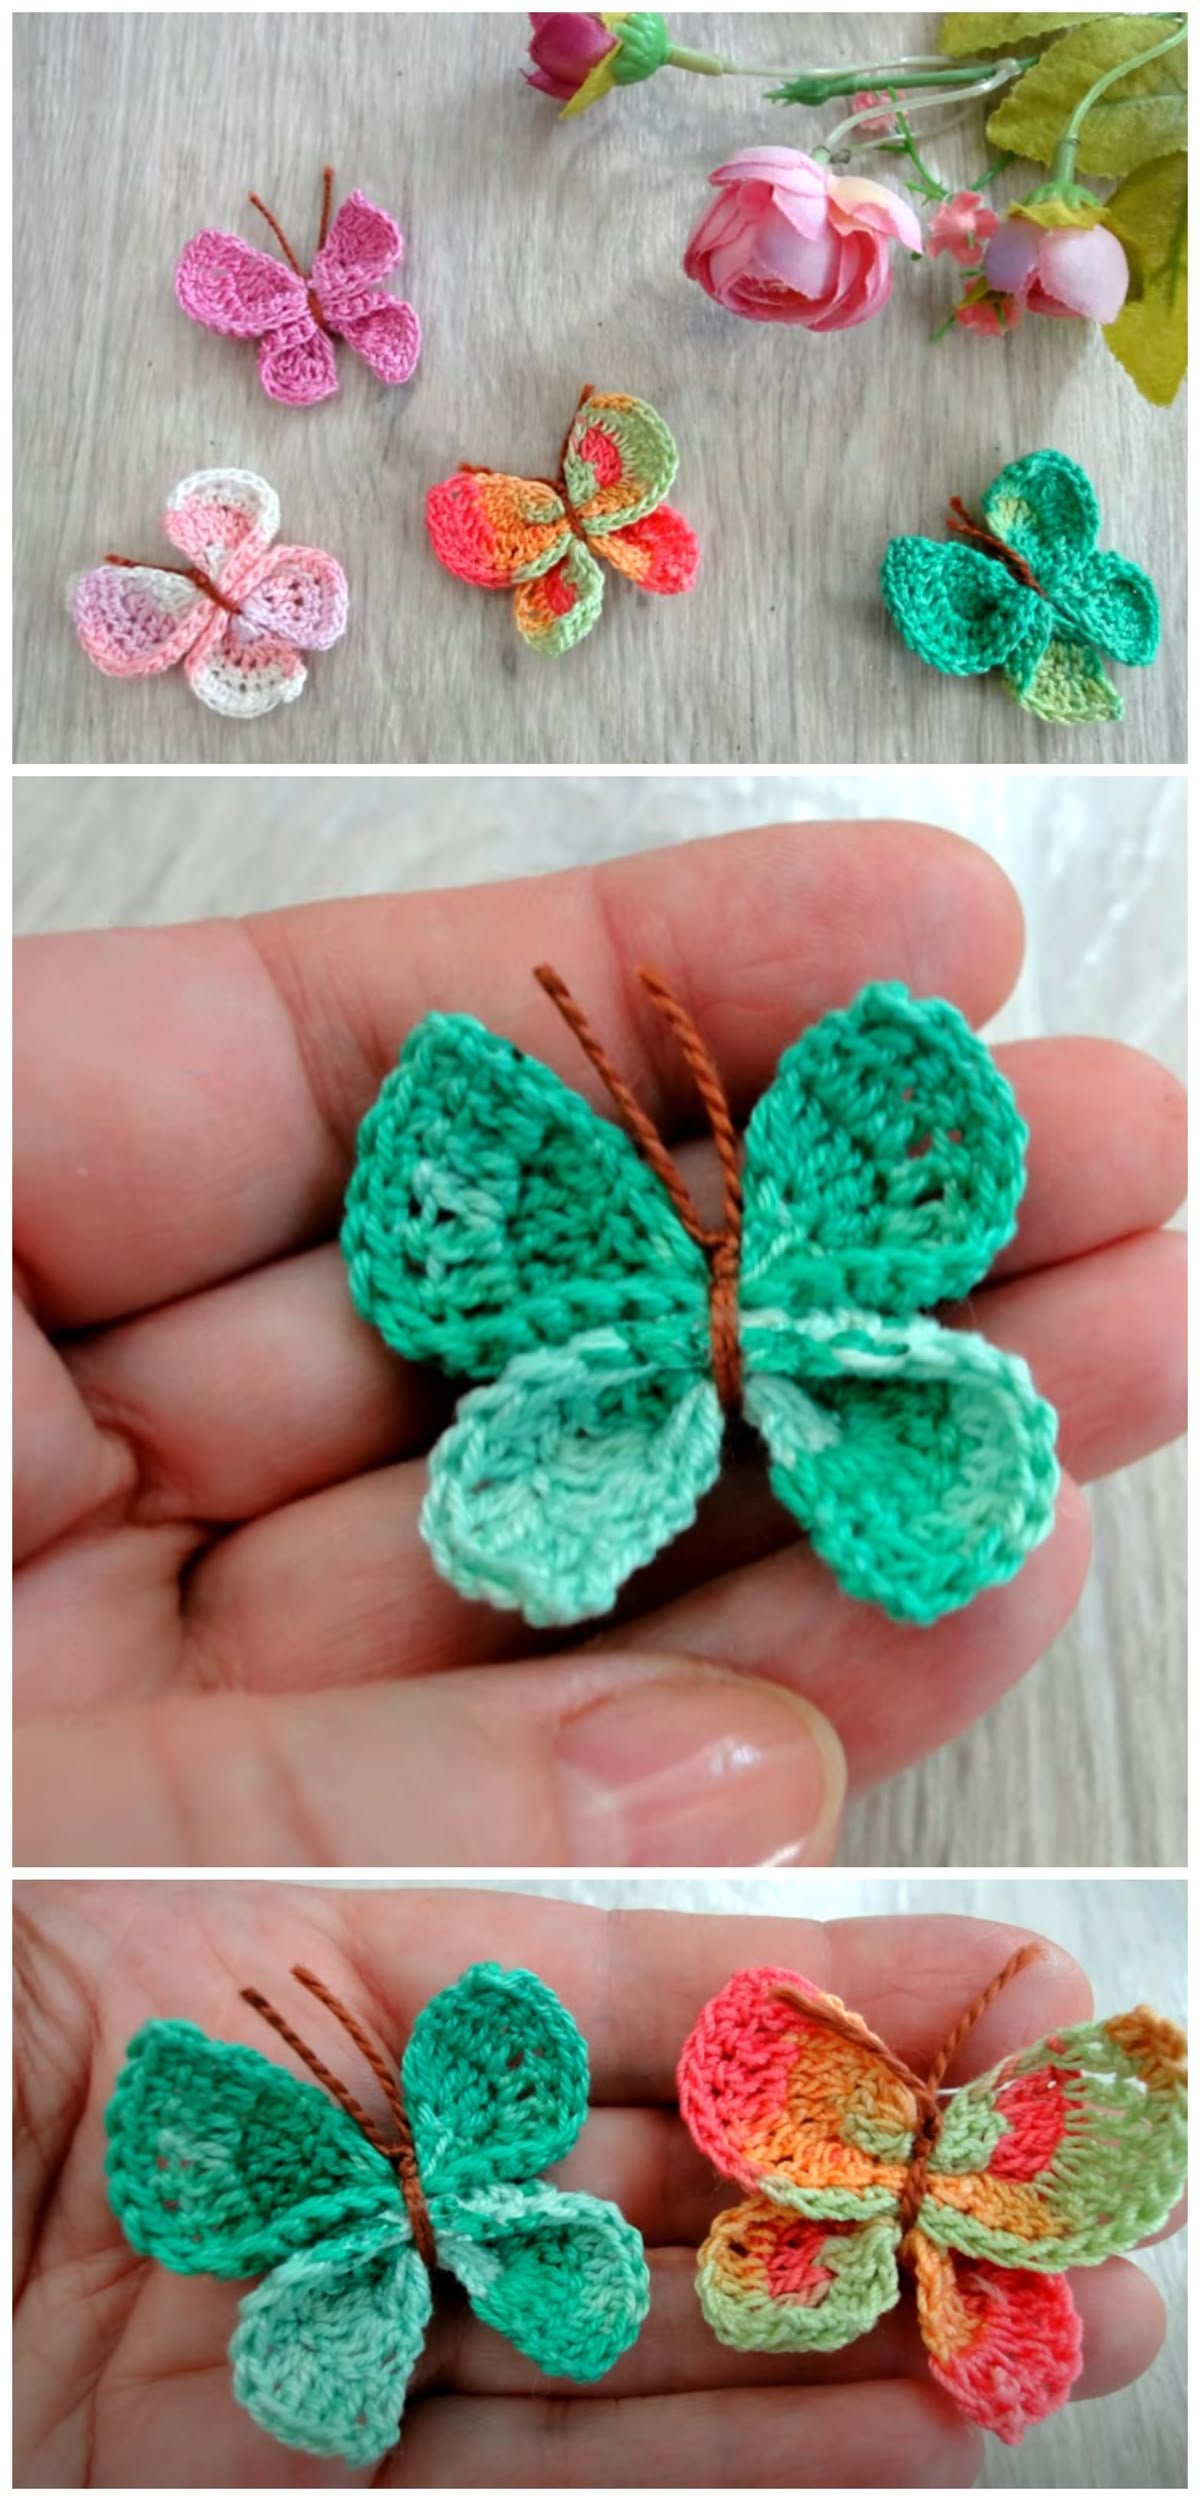
The Butterfly crochet tutorial – Crochet Pattern typically begins with creating two small wings and two larger wings, which are then joined together. This structure gives the butterfly its realistic shape and allows for plenty of creative variation.
Start by making a magic ring or chain loop for the butterfly’s body center. Work a set number of stitches into this loop to form the top wings. For beginners, double crochet stitches are ideal because they add height and create a soft curve for the wing edges.
Once the top wings are complete, you’ll move on to the bottom wings, which are slightly smaller. Using half double crochet or single crochet stitches gives these wings a denser, rounded look. The contrast between the top and bottom wings adds to the butterfly’s lifelike appeal.
After finishing both sets of wings, fold the piece gently in the center and secure it with a chain or wrap of yarn to form the butterfly’s body. This creates the illusion of two wings on each side and gives the design its characteristic shape.
You can add extra details such as antennae by chaining a few stitches from the top of the head and tying small knots at the ends. Embellishments like beads, sequins, or embroidery can also enhance your design.
Once your butterfly is assembled, weave in all loose ends neatly. Your crochet butterfly is now ready to be displayed, attached to a project, or gifted.
3. Tips and Tricks for Perfecting Your Butterfly Crochet Tutorial – Crochet Pattern
Even though the Butterfly crochet tutorial – Crochet Pattern is beginner-friendly, a few helpful tips can make your butterflies even more polished and professional-looking.
Maintain consistent tension throughout your work to ensure both wings are symmetrical. Uneven tension can cause one wing to be larger than the other, throwing off the balance of the design.
Experiment with yarn textures. Smooth cotton creates crisp stitches, while fluffy or textured yarns can give your butterflies a soft, whimsical look.
If you’re working with multiple colors, plan your color changes carefully. Fasten off and weave in ends securely so that no loose yarn peeks through on the wings.
Blocking your finished butterflies can help them keep their shape, especially if you plan to use them as standalone decorations or wall art. Pin them to a soft surface, spray lightly with water, and let them dry in place.
Don’t be afraid to scale your pattern up or down. Using thicker yarn and a larger hook will create big statement butterflies, while fine thread and a small hook will yield delicate miniatures perfect for jewelry or appliqué.
Finally, make a few practice butterflies before committing to a big project. This will help you become comfortable with the pattern and develop your own variations.
4. Creative Ways to Use the Butterfly Crochet Tutorial – Crochet Pattern
One of the best aspects of the Butterfly crochet tutorial – Crochet Pattern is its versatility. These charming motifs can be used in many creative ways beyond just decoration.
You can sew crochet butterflies onto blankets, scarves, hats, or baby clothes to add a cheerful touch. They work wonderfully as appliqués for spring and summer-themed projects.
Attach a pin backing to transform your butterfly into a brooch, or glue a magnet on the back for a colorful fridge decoration.
String several butterflies together to make a beautiful garland for parties, weddings, or nurseries. Mixing different colors and sizes creates a playful, festive effect.
Use fine crochet thread to create delicate butterflies for earrings, necklaces, or hair accessories. This adds a handmade, personalized touch to your style.
Incorporate butterflies into greeting cards or scrapbooks. A flat, lightweight crochet butterfly can be easily attached to paper crafts, adding texture and charm.
Lastly, create themed sets of butterflies to give as thoughtful handmade gifts. Whether for nature lovers, children, or craft enthusiasts, these small creations bring joy.
FAQ – Butterfly Crochet Tutorial – Crochet Pattern
Q: Is the Butterfly crochet tutorial – Crochet Pattern good for beginners?
A: Yes, it uses basic stitches, making it perfect for beginners who want to practice shaping techniques.
Q: How long does it take to make one butterfly?
A: Depending on your skill level, a single butterfly can be completed in 20–40 minutes.
Q: What type of yarn works best?
A: Lightweight cotton or acrylic yarn gives the best stitch definition and shape retention.
Q: Can I make the butterflies in different sizes?
A: Yes, simply change your yarn weight and hook size to scale the pattern up or down.
Q: Do I need to block my butterflies?
A: It’s optional, but blocking helps them lie flat and hold their shape, especially for display.
Q: Can I attach my butterflies to other crochet projects?
A: Absolutely. They work beautifully as appliqués for blankets, clothing, or accessories.
The Butterfly crochet tutorial – Crochet Pattern is a delightful project that blends simplicity, creativity, and versatility. With just a few materials and basic stitches, you can create beautiful butterflies in endless color combinations and styles. This pattern is perfect for quick projects, gifts, or adding a touch of charm to larger creations.
Now that you have the steps, tips, and creative ideas, it’s time to grab your hook and bring your butterflies to life. I’d love to hear your thoughts and suggestions—share your experience and inspire other crochet lovers with your unique creations!