
Creating a Sunflower in Amigurumi – Crochet Pattern is one of the most joyful and rewarding crochet projects you can take on. This design brings warmth, charm, and a touch of nature’s beauty into your handmade collection. Whether you’re a beginner or a seasoned crocheter, this pattern allows you to explore the whimsical world of amigurumi while creating a cheerful sunflower that brightens any space.
The Sunflower in Amigurumi – Crochet Pattern is more than just a cute creation—it’s also a great way to practice basic crochet stitches, color changes, and the assembly of small pieces. Sunflowers symbolize positivity and energy, and when crafted through crochet, they become delightful gifts, keychain accessories, or even playful home decor.
In this tutorial, you’ll learn step-by-step how to make your own Sunflower in Amigurumi – Crochet Pattern from start to finish. We’ll cover the materials you need, basic stitches, shaping techniques, and ideas for customization to help you make it your own.
1. Gathering Your Materials and Tools
To start your Sunflower in Amigurumi – Crochet Pattern, you’ll first need a few essential supplies. These can easily be found at craft stores or online, and most are items you may already have at home if you crochet regularly.
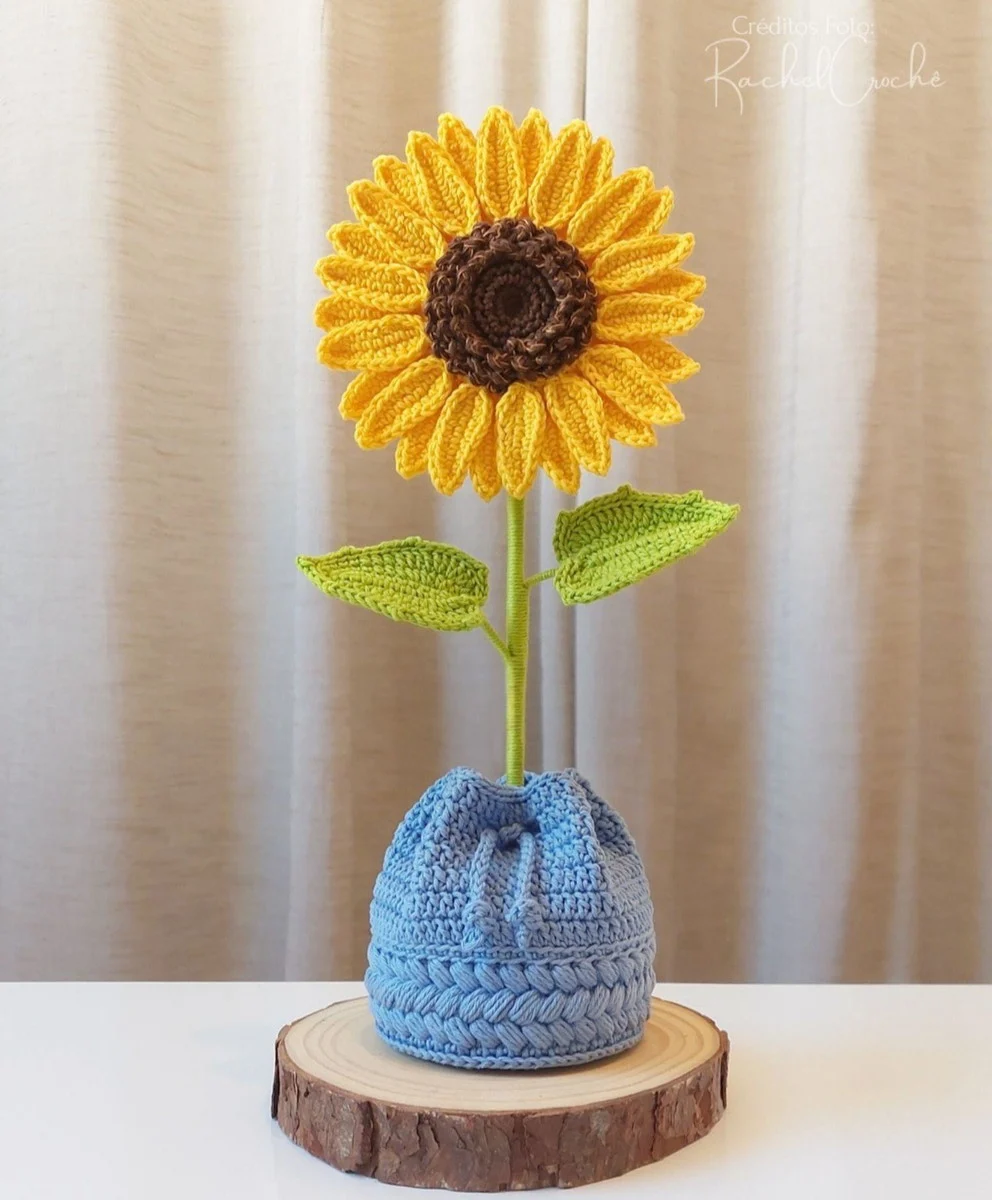
Choose a soft acrylic yarn or cotton yarn in three main colors: yellow (for petals), brown (for the center), and green (for the leaves and stem). These colors help your sunflower come to life with a realistic look.
You’ll also need a crochet hook suitable for the thickness of your yarn. Most amigurumi patterns use a smaller hook size than the yarn recommends, to create tight, neat stitches.
Other essential items include a tapestry needle for sewing pieces together, a pair of sharp scissors, and polyester fiberfill for stuffing the center of your flower. Some crafters like to add safety eyes, though they are optional.
If you want your sunflower to stand or be used as decor, you may also want floral wire or pipe cleaners to shape the stem. These can be inserted during the assembly phase.
Having all your materials ready before you begin makes the process smoother and more enjoyable. Place everything within reach so you can focus entirely on the creative experience.
2. Starting with the Center of the Sunflower
The center of your Sunflower in Amigurumi – Crochet Pattern begins as a small, rounded circle. It usually requires working in continuous rounds to form a dense, plush middle.
Start with a magic ring, a fundamental amigurumi technique that avoids a hole in the center. Into this ring, you’ll crochet six single crochets and then increase each round following your pattern instructions.
Use stitch markers to keep track of the beginning of your rounds. This helps maintain a perfect circular shape, which is crucial for the center of the flower.
After several rounds of increases, you’ll crochet plain rounds without increases to give the center some depth. This part is then slightly stuffed with fiberfill to hold its shape.
Once complete, fasten off and weave in the yarn tail. If making a double-sided sunflower, you may want to crochet a second piece just like the first, which will sandwich the petals later.
The brown center acts as the heart of your flower and sets the tone for the vibrant petals that will surround it. Make sure your stitches are even and consistent for a polished look.
3. Creating and Attaching the Petals
Now it’s time to bring color and life into your Sunflower in Amigurumi – Crochet Pattern by crocheting the iconic yellow petals. These are often created individually and sewn onto the center afterward.
Each petal starts with a chain foundation and includes single crochets, half double crochets, and double crochets to give it shape. You’ll typically work up one side of the chain and then down the other to complete the petal.
Aim to make between 10 and 16 petals depending on how full and lush you want your sunflower to appear. Keep your tension consistent so that all petals are the same size and shape.
After crocheting all your petals, arrange them evenly around the center. Pinning them in place before sewing can help with symmetry and spacing.
Use a tapestry needle and the yellow yarn tail from each petal to securely sew them onto the brown center. Take your time during this phase to ensure a neat and symmetrical result.
Adding a second layer of petals behind the first row creates extra fullness and a more realistic effect. For a fun twist, you can even use different shades of yellow for depth.
4. Shaping the Leaves and Optional Stem
To complete your Sunflower in Amigurumi – Crochet Pattern, you’ll want to add green leaves and, optionally, a stem. These pieces add realism and balance to your sunflower, making it more visually interesting.
Leaves are usually made with a simple chain and row-based construction. You’ll start with a chain and crochet back and forth, shaping one side and then the other to mirror the shape.
Depending on your design, you may want one or two small leaves or larger, statement-making ones. Use a light to medium green shade to contrast beautifully with the yellow petals.
To add structure to the leaves, some crocheters like to slip a small piece of wire inside or use a surface slip stitch for extra definition in the leaf’s veins.
If you’re including a stem, you can either crochet a long tube and stuff it with fiberfill or use floral wire wrapped in yarn. For sturdiness, a combination of both often works best.
Attach the leaves to the stem or base of the flower using a yarn needle. Make sure all joins are secure, especially if the sunflower will be used as a toy or decorative piece.
With leaves and stem in place, your sunflower becomes a complete, three-dimensional amigurumi masterpiece ready for gifting or display.
FAQ – Frequently Asked Questions
What yarn is best for the Sunflower in Amigurumi – Crochet Pattern?
Acrylic or cotton yarn in DK or worsted weight works best. Cotton provides structure while acrylic offers softness and ease of use.
Can I make the Sunflower in Amigurumi without a stem?
Absolutely! Many crafters prefer to make just the head of the sunflower and turn it into a magnet, keychain, or brooch.
Do I need to use safety eyes for this pattern?
Safety eyes are optional. If you’re giving the sunflower to a small child, it’s better to embroider features instead to ensure safety.
Is this pattern beginner-friendly?
Yes! With basic stitches like single crochet, increases, and magic ring, it’s a great beginner amigurumi project. Just follow step-by-step and take your time.
How do I clean my amigurumi sunflower?
Spot cleaning with mild soap and a damp cloth is ideal. Avoid machine washing if your flower has wire or small parts.
Can I sell finished products made from this pattern?
Yes, as long as you’re not distributing or selling the written pattern itself, you can sell the items you crochet by hand.
In this article, we explored how to create your very own Sunflower in Amigurumi – Crochet Pattern from start to finish. From gathering the right materials to crafting the center, petals, and leaves, this cheerful flower is a fantastic addition to any crochet collection. It brings joy, creativity, and handmade warmth wherever it goes.
Whether you want to make a single flower or a full bouquet, this project is versatile, beginner-friendly, and bursting with charm. We hope this tutorial has inspired you to pick up your hook and try the Sunflower in Amigurumi – Crochet Pattern today.
If you’ve enjoyed this tutorial, please leave a sincere comment below with your thoughts, experiences, or suggestions. We’d love to hear how your sunflower turned out or if you have any creative ideas for future amigurumi designs!