
Amigurumi Axolotl – Crochet Pattern projects have become incredibly popular among crochet lovers who enjoy creating adorable handmade creatures. The axolotl, a fascinating amphibian known for its cute smile and feathery gills, has captured the hearts of crafters all over the world. Turning this charming animal into a crochet creation allows makers to combine creativity, relaxation, and artistic expression in one delightful project.
Crochet enthusiasts love amigurumi because it transforms simple yarn and a hook into something magical. When you work on an Amigurumi Axolotl – Crochet Pattern, each stitch slowly shapes the tiny body, the playful tail, and the iconic gills that make the axolotl so recognizable. Even beginners can enjoy this type of project because the basic techniques are accessible, while more experienced crocheters can personalize their designs with colors, textures, and unique details.
Another reason why the Amigurumi Axolotl – Crochet Pattern is so beloved is that it blends craft with storytelling. Handmade toys often carry personality, and an axolotl amigurumi can become a thoughtful gift, a decorative piece, or even part of a growing crochet collection. By understanding the techniques and structure behind this pattern, anyone can create a charming axolotl that feels both professional and uniquely handmade.
1. Understanding the Charm of the Amigurumi Axolotl
The axolotl is widely admired for its unique appearance and friendly expression, which makes it a perfect subject for crochet projects. When crocheters explore an Amigurumi Axolotl – Crochet Pattern, they discover how well the animal’s shape translates into soft yarn forms. Its rounded body and distinctive frilly gills allow for creative interpretation and charming results.
One of the most appealing aspects of this pattern is the balance between simplicity and detail. The body structure is typically made using basic amigurumi techniques such as crocheting in the round, increasing, and decreasing stitches. These fundamental methods create the smooth, rounded shapes that define most amigurumi designs.
The gills are often the highlight of the project. In many Amigurumi Axolotl – Crochet Pattern variations, the gills are made with loops, chains, or small textured stitches. These elements give the finished piece its playful personality and instantly make the axolotl recognizable.
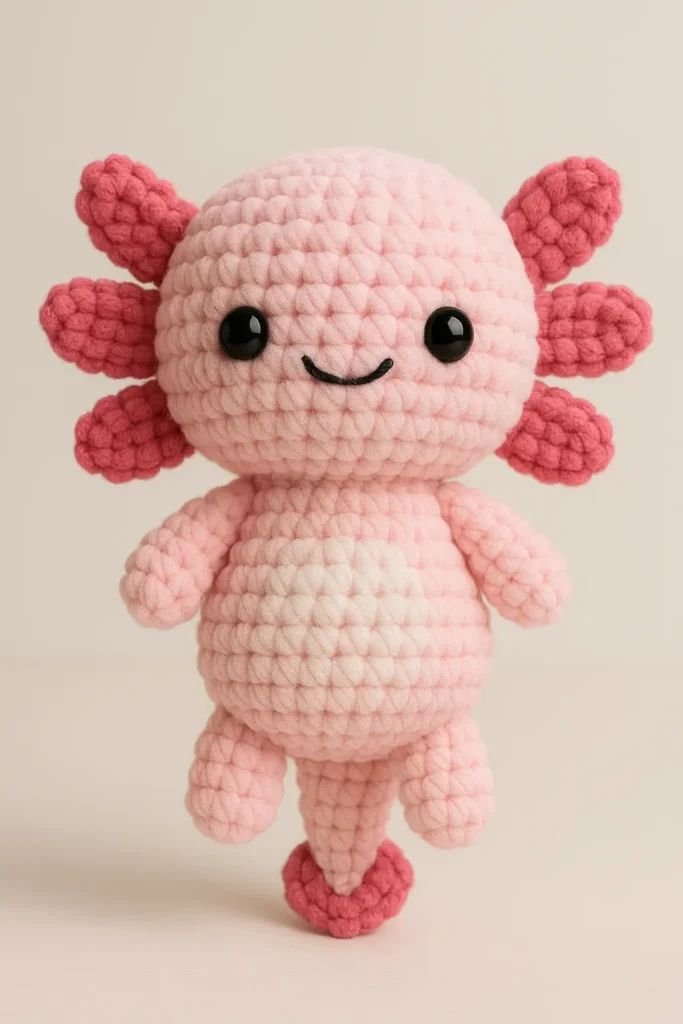
Color choice also plays an important role in bringing the axolotl to life. While natural axolotls are often pink, crochet versions allow for endless creativity. Crocheters frequently experiment with pastel shades, vibrant tones, or even rainbow combinations to give their amigurumi a unique identity.
Another charming feature is the expressive face. Simple embroidery techniques can create a smile, sleepy eyes, or curious expressions. These small details transform the crochet piece from a basic toy into a character with personality.
Because of its lovable appearance and manageable structure, the Amigurumi Axolotl – Crochet Pattern is a favorite among both beginners and experienced crafters. It offers the perfect opportunity to practice essential crochet skills while creating something irresistibly cute.
2. Materials and Basic Techniques for the Pattern
Before starting an Amigurumi Axolotl – Crochet Pattern, it is helpful to gather the right materials. Most projects require medium or lightweight yarn, a crochet hook that matches the yarn size, fiberfill stuffing, a yarn needle, and stitch markers. These simple tools are enough to create a beautiful handmade axolotl.
Yarn selection can greatly influence the final appearance of the project. Cotton yarn is often preferred because it holds stitches clearly and maintains the shape of the amigurumi. However, acrylic yarn is also a popular option because it is widely available and comes in many colors.
Crochet hooks should be slightly smaller than what is typically recommended for the yarn. This tighter stitch helps ensure the stuffing does not show through the fabric. Dense stitches are a key characteristic of well-made amigurumi pieces.
The foundation of most Amigurumi Axolotl – Crochet Pattern designs is the magic ring. This technique allows crocheters to begin working in a circular shape without leaving a hole in the center. From there, stitches are gradually increased to form the head and body.
Single crochet stitches are the most commonly used stitch in amigurumi. They create a tight, even fabric that is perfect for shaping small creatures. Learning to increase and decrease smoothly helps form the curves of the axolotl’s body and tail.
Finally, stuffing and assembly complete the project. Fiberfill is gently inserted into the crocheted pieces to give them structure and softness. Afterward, parts such as gills, limbs, and facial features are sewn securely to finish the adorable axolotl design.
3. Step-by-Step Structure of the Amigurumi Axolotl
The typical Amigurumi Axolotl – Crochet Pattern begins with the head and body, which are often crocheted as a single piece. Starting from the top of the head, the crocheter works in continuous rounds while gradually increasing stitches to create a rounded shape.
Once the head reaches the desired width, the pattern usually transitions into the body section. At this stage, fewer increases are used, allowing the shape to become slightly elongated while maintaining a soft and smooth silhouette.
The tail is another defining element of the axolotl design. In many patterns, the tail tapers slightly toward the end, achieved by carefully decreasing stitches. Some versions also include a fin-like edge that runs along the tail for extra visual interest.
Next come the legs, which are typically small and simple to crochet. Each leg is often made separately using a few rounds of single crochet stitches. Despite their simplicity, these tiny limbs add balance and realism to the finished amigurumi.
The gills are often crocheted last. Depending on the pattern, they may involve chains, loops, or textured stitches to imitate the feathery look of a real axolotl’s gills. These pieces are then attached to each side of the head.
When all the parts are assembled, the Amigurumi Axolotl – Crochet Pattern finally comes together. The final touches, such as embroidered eyes or blush details, bring warmth and personality to the finished piece.
4. Creative Ideas and Customization Options
One of the most exciting aspects of working with an Amigurumi Axolotl – Crochet Pattern is the freedom to customize the design. Even small adjustments in yarn color or stitch texture can completely change the personality of the finished project.
Color creativity is one of the easiest ways to personalize the axolotl. While soft pink shades are traditional, crocheters often explore lavender, mint green, pale yellow, or even multi-colored yarns to create imaginative variations.
Texture can also enhance the visual appeal of the project. Some crocheters add bobble stitches or subtle ridges along the body or tail to create extra dimension. These details can make the amigurumi stand out even more.
Accessories are another fun option. Tiny crochet scarves, miniature hats, or small bows can turn the axolotl into a seasonal decoration or themed character. These additions are simple but add a lot of charm.
Scaling the size of the pattern is also possible. By changing yarn thickness and hook size, crocheters can create a tiny pocket-sized axolotl or a larger plush version suitable for decoration.
Through these creative choices, each Amigurumi Axolotl – Crochet Pattern becomes a unique expression of the maker’s style. No two handmade axolotls are exactly the same, which makes the craft even more special.
FAQ About Amigurumi Axolotl – Crochet Pattern
Is the Amigurumi Axolotl pattern suitable for beginners?
Yes, many versions of the Amigurumi Axolotl – Crochet Pattern are beginner-friendly because they rely mostly on basic stitches such as single crochet, increases, and decreases.
What type of yarn works best for amigurumi projects?
Cotton yarn is often recommended because it provides good stitch definition and structure. However, acrylic yarn can also work well and offers a wide variety of colors.
How long does it take to crochet an amigurumi axolotl?
The time varies depending on experience and pattern complexity, but many crocheters can complete a small axolotl in a few hours or over a relaxing weekend.
Do I need safety eyes for the project?
Safety eyes are optional. Some crafters prefer using embroidery to create facial features, especially when the toy is intended for young children.
Can I customize the size of the axolotl?
Yes, adjusting the yarn thickness and hook size can make the axolotl larger or smaller while following the same Amigurumi Axolotl – Crochet Pattern structure.
Why is my amigurumi shape uneven?
Uneven shapes usually occur due to inconsistent tension. Practicing steady stitch tension and counting stitches carefully can help maintain a balanced design.
Creating a Amigurumi Axolotl – Crochet Pattern is a joyful and rewarding crochet project that combines creativity, relaxation, and craftsmanship. Throughout this article, we explored the charm of the axolotl design, the essential materials and techniques needed, the step-by-step structure of the pattern, and the many ways to customize your handmade creation.
By understanding these elements, crocheters of all skill levels can confidently start their own amigurumi axolotl and enjoy the process of bringing this adorable creature to life. Each stitch contributes to shaping a small character filled with personality and warmth.
If you enjoyed learning about the Amigurumi Axolotl – Crochet Pattern, feel free to share your honest opinion and suggestions. Your feedback helps improve future tutorials and inspires more creative crochet ideas for everyone who loves handmade crafts.