
Granny Square Quilt Block Tutorial is a timeless and versatile technique that brings together the charm of traditional quilting and the geometric beauty of classic patchwork design. Whether you are a beginner exploring your first quilt block or an experienced quilter looking to revisit a beloved pattern, this guide will walk you through every step with clarity and confidence. Throughout this article, we will explore the structure, techniques, and creative possibilities behind the Granny Square Quilt Block Tutorial, ensuring you feel inspired and prepared to start stitching.
The appeal of the Granny Square Quilt Block Tutorial lies in its simplicity and adaptability. Inspired by the traditional granny square motif often seen in crochet, this quilt block translates beautifully into fabric form. The block is typically built from small squares arranged concentrically, creating a bold, layered effect that works well with solids, florals, and even modern prints. Because of its modular design, it is perfect for scrap quilting, allowing you to use leftover fabric pieces in a creative and meaningful way.
Beyond its aesthetic appeal, the Granny Square Quilt Block Tutorial is also a practical learning tool. It teaches fundamental quilting skills such as precise cutting, accurate seam allowances, pressing techniques, and color planning. These essential techniques help build confidence and consistency in your quilting journey. By mastering this block, you gain the foundation to create full quilts, table runners, pillows, and other patchwork projects that showcase both craftsmanship and creativity.
1. Understanding the Structure of the Granny Square Quilt Block Tutorial
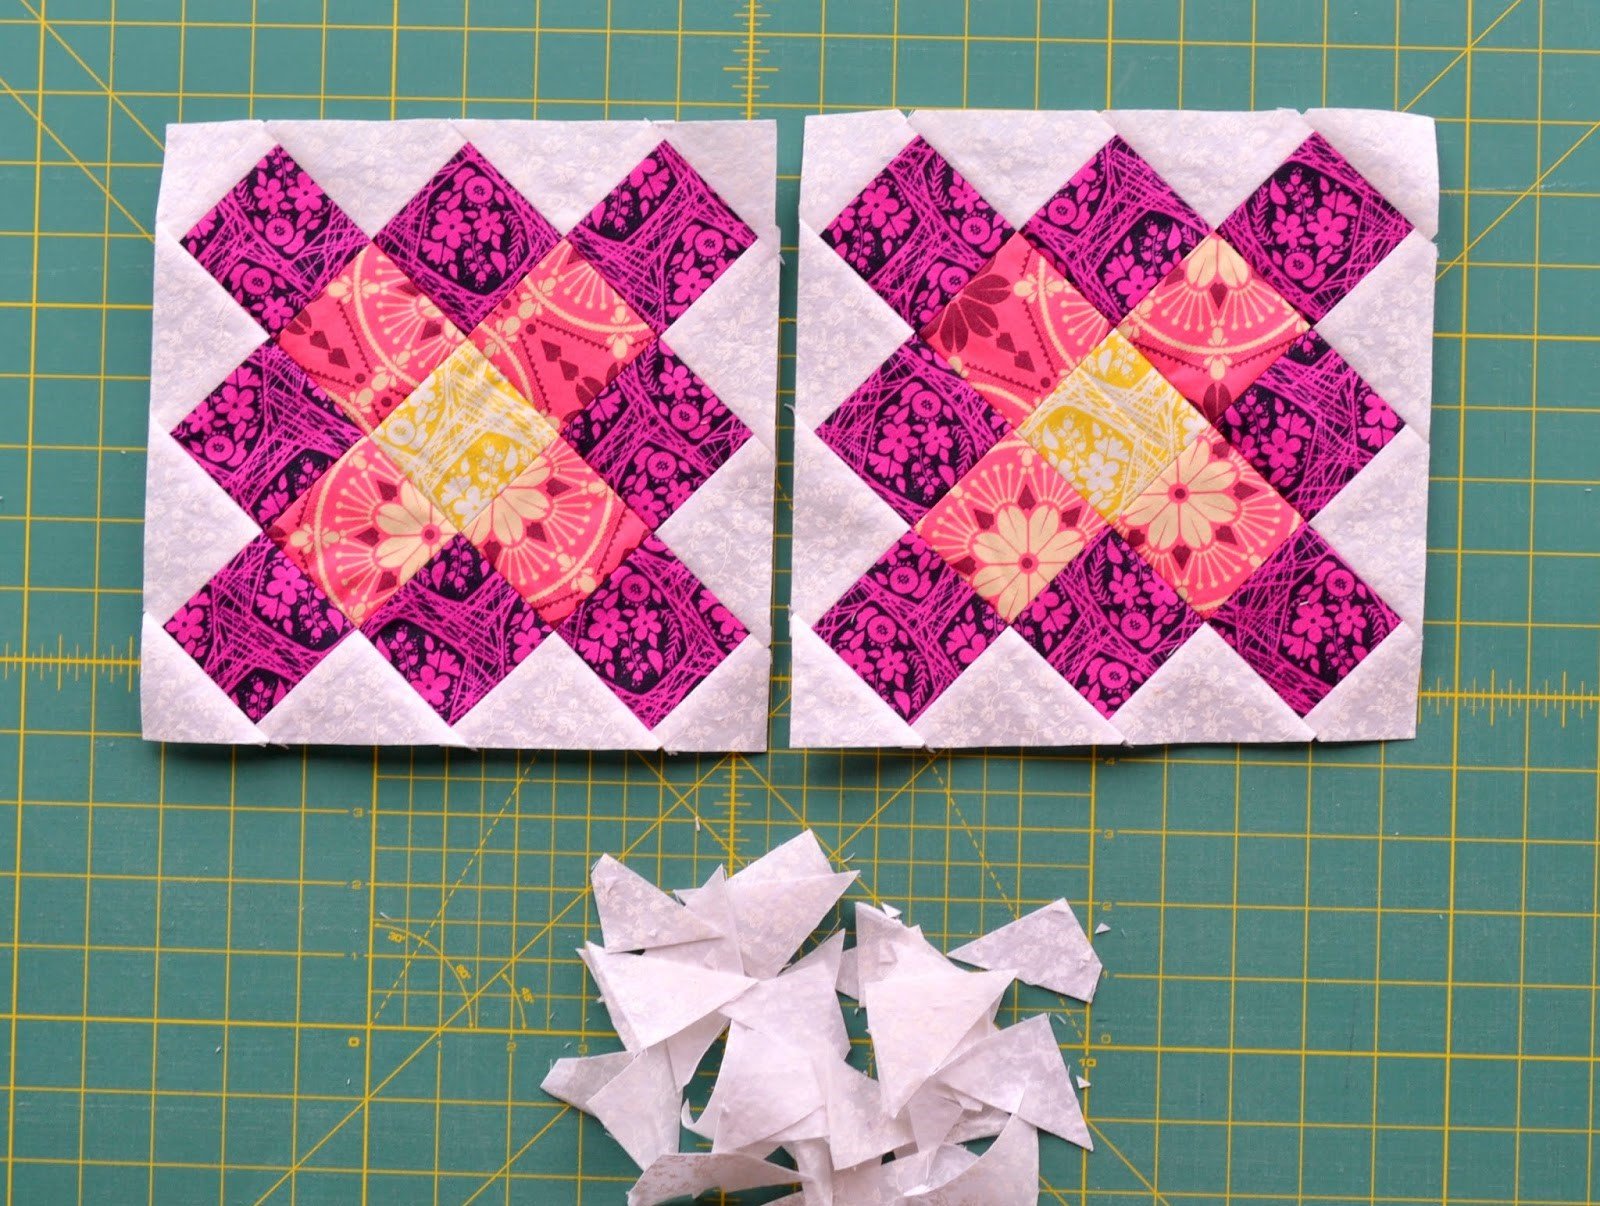
The foundation of the Granny Square Quilt Block Tutorial begins with understanding its layout. At its core, the block is composed of small squares arranged around a central square. Each “round” frames the previous one, gradually increasing the size of the block while maintaining symmetry and balance. This structured layering creates a visually satisfying effect that draws the eye toward the center.
Typically, the block starts with one central square. Around this square, four additional squares are sewn to form the first round. The next round adds more squares, building outward in a square formation. The design relies heavily on consistent measurements and accurate seam allowances to ensure all edges align perfectly.
Precision is key when constructing the Granny Square Quilt Block Tutorial. A standard quarter-inch seam allowance is recommended for quilting projects. Even small inconsistencies can affect how the squares line up in later rounds. Taking the time to measure and trim accurately will save you frustration during assembly.
Color placement plays a major role in the success of the block. Many quilters choose a bold center fabric to create a focal point. From there, surrounding rounds can either contrast sharply or blend softly for a more subtle effect. Planning your color scheme before sewing helps maintain visual harmony throughout the quilt.
Fabric selection is equally important. Cotton quilting fabric is often preferred because it is stable, easy to press, and widely available in various prints and solids. Prewashing your fabric can reduce shrinkage and ensure your finished quilt maintains its shape over time.
Understanding the geometry behind the Granny Square Quilt Block Tutorial helps you see how small pieces come together into a cohesive design. Once you grasp the structure, the sewing process becomes intuitive and enjoyable, allowing you to focus more on creativity than on technical concerns.
2. Materials and Preparation for the Granny Square Quilt Block Tutorial
Before beginning the Granny Square Quilt Block Tutorial, gathering the right materials ensures a smooth experience. You will need quilting cotton fabric, a rotary cutter, a self-healing cutting mat, a quilting ruler, thread, pins or clips, and a sewing machine. Having all tools within reach helps maintain workflow and accuracy.
Choosing fabric colors is one of the most exciting parts of the process. Many quilters enjoy creating a scrappy look by combining various leftover fabrics. Others prefer a coordinated palette with a consistent theme. Both approaches work beautifully within the Granny Square Quilt Block Tutorial, depending on your personal style.
Cutting accuracy directly impacts the final result. Begin by cutting your central square according to your desired finished block size. Then cut the surrounding squares for each round. Keeping pieces organized in labeled stacks prevents confusion during assembly.
Pressing is an often overlooked but essential step. After sewing each seam, press the seam allowance either open or to one side, depending on your preference. Consistent pressing ensures flat seams and crisp corners, which are critical for precise block construction.
Thread choice should complement your fabric selection. Neutral cotton thread works well for most quilting projects. Using quality thread reduces lint buildup and prevents breakage during sewing, helping maintain the integrity of your stitches.
Preparation also includes setting up your sewing space. Adequate lighting, a comfortable chair, and a clean surface contribute to accuracy and enjoyment. When everything is organized, the Granny Square Quilt Block Tutorial becomes a relaxing and rewarding creative session.
3. Step-by-Step Assembly of the Granny Square Quilt Block Tutorial
The assembly process of the Granny Square Quilt Block Tutorial begins with sewing the central square to the first set of surrounding squares. Attach one square to each side, working methodically to maintain alignment. Sew with a consistent quarter-inch seam allowance for uniformity.
After completing the first round, press the seams carefully. Pressing outward often reduces bulk in the center. Check that your block remains square before moving to the next round. Trimming stray threads helps maintain a clean finish.
The second round involves sewing longer strips or pairs of squares together before attaching them to the block. This method, sometimes called chain piecing, can save time and improve efficiency. Align corners carefully to preserve the block’s symmetry.
As you add more rounds, the block will gradually increase in size. Periodically measure the block to ensure it matches your intended dimensions. Minor adjustments can be made by trimming edges evenly, but large discrepancies may require resewing.
Maintaining consistent seam allowances throughout the Granny Square Quilt Block Tutorial ensures that all blocks fit together seamlessly if you plan to make multiple units for a full quilt. Consistency is the foundation of professional-looking patchwork.
Once your desired number of rounds is complete, give the block a final press. The finished unit should lie flat with sharp corners and balanced proportions. At this stage, you can repeat the process to create additional blocks for a larger project.
4. Creative Variations and Design Ideas for the Granny Square Quilt Block Tutorial
One of the greatest strengths of the Granny Square Quilt Block Tutorial is its flexibility. You can experiment with scale by increasing or decreasing the size of the central square. Larger centers create bold statements, while smaller centers emphasize intricate detail.
Playing with color gradients adds visual depth. For example, you might transition from dark in the center to lighter shades in the outer rounds. This creates a subtle ombré effect that enhances dimension without complicating the construction process.
Mixing prints and solids provides another creative opportunity. A patterned center surrounded by solid rounds can anchor the design. Alternatively, alternating prints in each round introduces movement and energy to the quilt layout.
The block can also be adapted for seasonal themes. Warm autumn tones create cozy seasonal quilts, while pastel combinations evoke springtime freshness. The structure of the Granny Square Quilt Block Tutorial remains the same, but fabric choices dramatically transform the final look.
Beyond quilts, individual blocks can be turned into cushion covers, tote bags, or wall hangings. Because the block is self-contained, it works beautifully as a standalone feature piece. Adding borders or sashing expands its versatility even further.
Experimentation is part of the joy of quilting. Once you feel confident with the standard construction, try adjusting proportions or combining this block with other traditional quilt blocks. The Granny Square Quilt Block Tutorial serves as both a foundational lesson and a creative playground.
FAQ About Granny Square Quilt Block Tutorial
What size should a Granny Square Quilt Block be?
The size can vary depending on your project. Common finished sizes range from 8 to 12 inches. The flexibility of the Granny Square Quilt Block Tutorial allows you to adjust dimensions by modifying the size of each square.
Is the Granny Square Quilt Block suitable for beginners?
Yes, it is highly beginner-friendly. The block uses simple straight seams and repetitive construction, making it ideal for learning basic quilting skills while producing beautiful results.
Do I need special tools for this tutorial?
Standard quilting tools are sufficient. A rotary cutter, ruler, cutting mat, sewing machine, and iron are the primary essentials for successfully completing the Granny Square Quilt Block Tutorial.
How many blocks do I need for a full quilt?
The number depends on your desired quilt size. For example, a throw quilt might require 12 to 20 blocks, while a larger bed quilt could require 30 or more.
Can I hand sew this block instead of using a machine?
Yes, hand sewing is possible, though it may take more time. Precision and consistent seam allowances remain important regardless of the method.
What is the best fabric for this project?
Quilting cotton is recommended because it is stable and easy to work with. High-quality cotton ensures durability and a polished final result.
In this comprehensive Granny Square Quilt Block Tutorial, we explored the structure, materials, assembly process, and creative possibilities of this classic quilt design. You learned how to plan your layout, cut and sew with precision, press effectively, and experiment with color and scale. The beauty of the Granny Square Quilt Block Tutorial lies in its simplicity, versatility, and timeless appeal.
By mastering this technique, you gain not only a beautiful quilt block but also foundational skills that apply to many other quilting projects. Whether you choose to create a full quilt, decorative cushions, or a meaningful handmade gift, this block offers endless opportunities for creativity.
I would love to hear your honest opinion about this guide. Did it help you feel more confident about starting your project? Do you have suggestions or personal tips to share about the Granny Square Quilt Block Tutorial? Your feedback and ideas are always welcome and help inspire future creative journeys.