
The Friendship Star Quilt Block Tutorial – Quilt Pattern is a timeless design cherished by quilters for generations. Its simple yet elegant star motif symbolizes warmth, unity, and the bond of friendship, making it a beautiful addition to any quilt. This pattern is ideal for both beginners and experienced quilters, as it offers straightforward construction while allowing endless possibilities for color combinations and layout arrangements. Creating this block not only builds your quilting skills but also adds a meaningful touch to your projects.
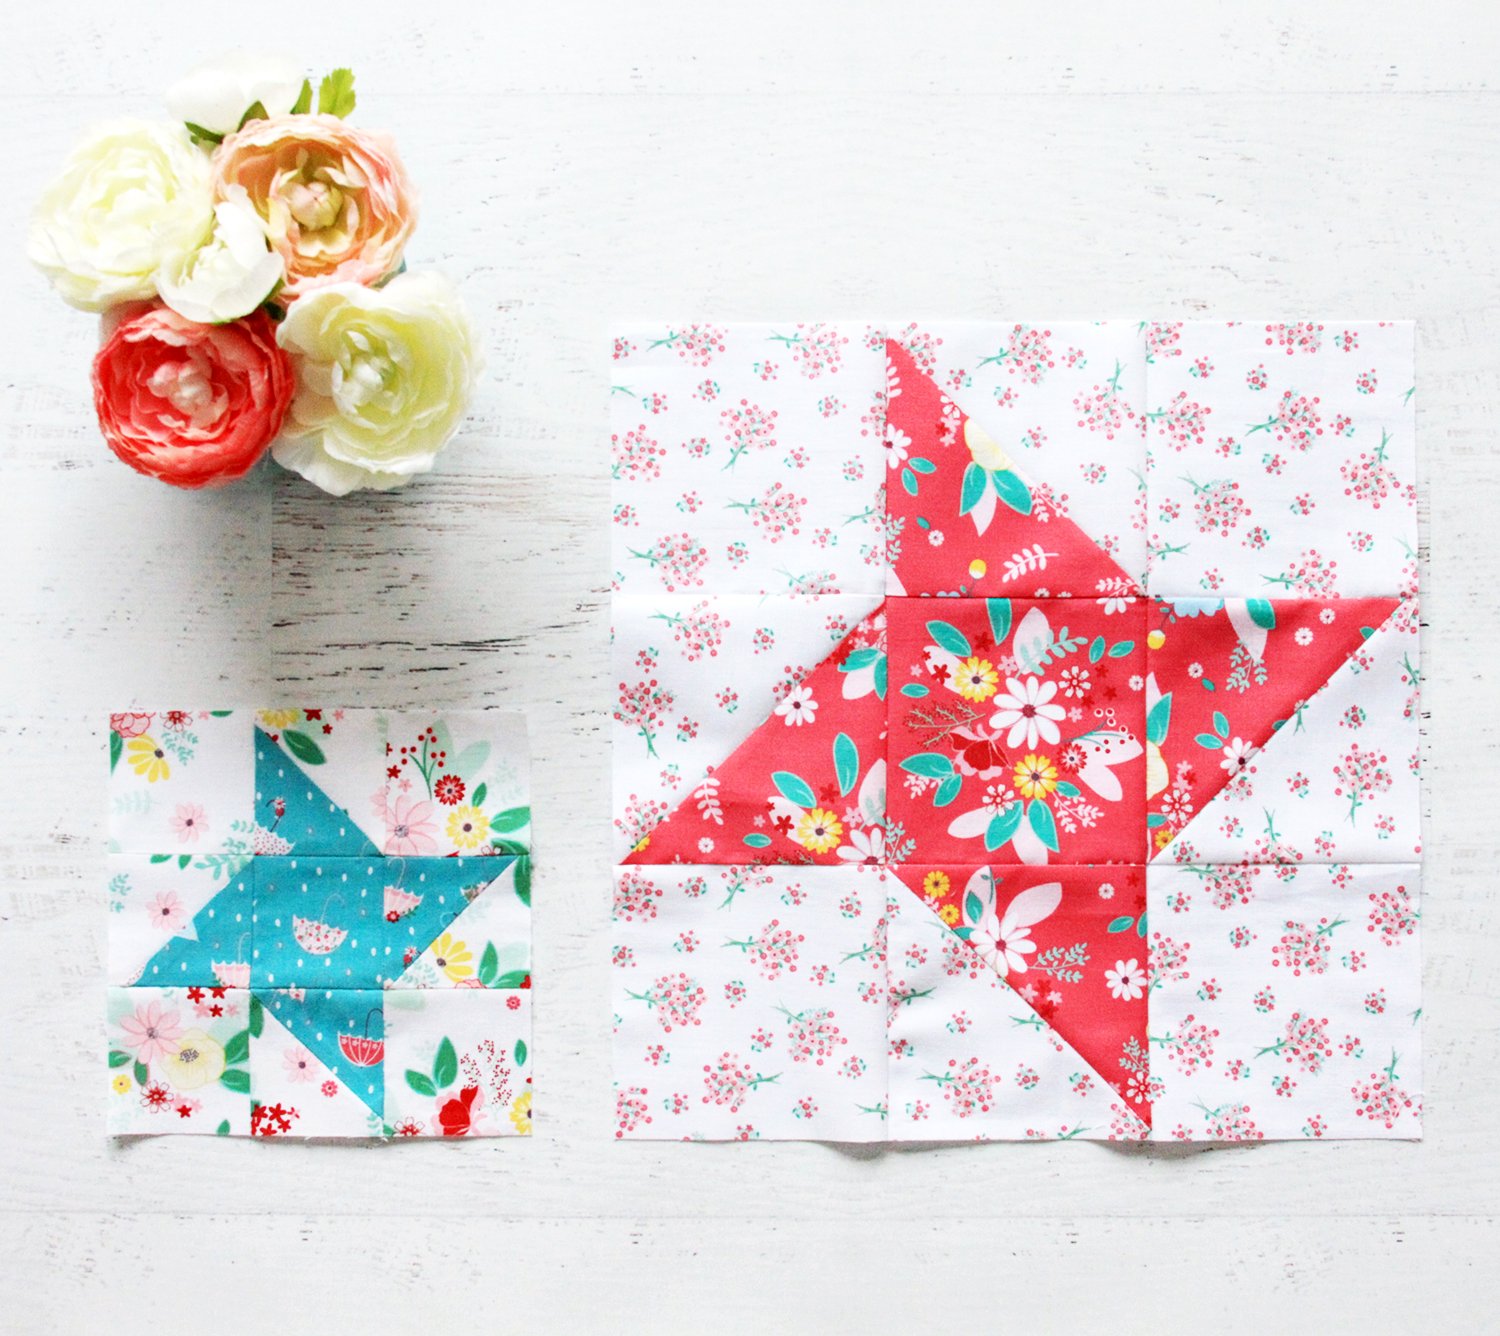
In the Friendship Star Quilt Block Tutorial – Quilt Pattern, you’ll learn how to cut, piece, and assemble the block with precision, ensuring crisp points and a balanced star shape. The design is based on a traditional nine-patch layout, with half-square triangles forming the star points and solid squares making up the center and background. This simplicity allows you to focus on fabric choice and color placement, bringing out the best in the star design. Whether you use bold, modern prints or classic, subtle tones, the Friendship Star adapts beautifully to any style.
This guide will take you step-by-step through every stage of creating the Friendship Star Quilt Block Tutorial – Quilt Pattern. From selecting the right fabrics to arranging your pieces for the best visual impact, each section is designed to help you produce a block that’s both accurate and visually striking. You’ll also find helpful tips to avoid common mistakes, along with suggestions for incorporating the Friendship Star into larger quilt projects for stunning results.
1. Choosing Fabrics for the Friendship Star Quilt Block
The first step in making a Friendship Star Quilt Block Tutorial – Quilt Pattern is selecting the fabrics that will bring your design to life. This block works best with two or three contrasting fabrics so the star stands out clearly from the background. High-contrast combinations—such as light backgrounds with dark stars—are especially effective.
When choosing fabrics, think about the overall theme of your quilt. For a cheerful and modern look, you might choose bright, playful colors. For a more traditional feel, soft pastels or reproduction prints work beautifully. The block’s simplicity means it can showcase both bold prints and delicate patterns.
Consider the scale of your fabric prints as well. Large-scale prints can sometimes overwhelm the star design, while small prints or solids help maintain the block’s clarity. If you want the star to be the focal point, opt for a fabric that contrasts strongly in both color and value with the background.
It’s also worth thinking about fabric quality. 100% quilting cotton is the most popular choice because it’s easy to work with and holds up well over time. Pre-washing your fabric can help prevent shrinkage and color bleeding after the quilt is finished.
Lastly, gather coordinating fabrics for any sashing, borders, or additional blocks you plan to use in your quilt. Having all your fabrics chosen at the start ensures a cohesive look across your finished project.
2. Cutting and Preparing the Pieces
Once you’ve chosen your fabrics for the Friendship Star Quilt Block Tutorial – Quilt Pattern, it’s time to cut them into the required shapes. Precision is crucial here to ensure your block comes together neatly without distorted seams.
The Friendship Star block is based on a nine-patch layout, which means you’ll need nine equal-sized sections. Four of these sections will be half-square triangles, four will be solid background squares, and one will be the center square of the star.
To make the half-square triangles, cut squares of fabric slightly larger than the finished size you want, then pair a background square with a star fabric square. Draw a diagonal line across the back of one square, sew ¼ inch on each side of the line, and cut along the drawn line. This creates two half-square triangle units that can be trimmed to the exact size needed.
Pressing your pieces is an important part of preparation. Press seams toward the darker fabric to avoid shadowing, and make sure each unit lies flat. This will make assembly smoother and help your points align perfectly.
Double-check all measurements before moving on. Even small cutting errors can cause the star points to misalign, so accuracy at this stage will save you frustration later.
Having all your pieces cut, pressed, and ready will make the assembly process much more enjoyable and efficient.
3. Assembling the Friendship Star Quilt Block
With your pieces cut and prepared, you can begin assembling the Friendship Star Quilt Block Tutorial – Quilt Pattern. Lay out all nine sections on your work surface so you can see the star pattern take shape. This arrangement helps you confirm that your colors and shapes are correctly positioned before you start sewing.
Begin by sewing the pieces in three horizontal rows. Use a consistent ¼-inch seam allowance throughout the block for accuracy. Press each row’s seams in opposite directions to make it easier to nest the seams when joining rows.
Once the rows are sewn, join them together to complete the block. Pay special attention to aligning the points of the star for a clean, professional look. Pinning at intersections can help keep everything in place while sewing.
After the block is assembled, give it a final press. This step is more than just cosmetic—pressing helps set the seams and ensures the block lies flat, making it easier to join with other blocks later.
If you plan to make multiple Friendship Star blocks for a larger quilt, it’s a good idea to work in an assembly-line fashion. Cutting, piecing, and pressing multiple units at once can save time and create consistency across all your blocks.
The finished Friendship Star block is versatile enough to be used on its own or combined with other traditional blocks for a variety of quilt designs.
4. Creative Layouts and Uses for the Friendship Star
One of the best things about the Friendship Star Quilt Block Tutorial – Quilt Pattern is its versatility. This classic design can be used in many creative ways to suit your quilting style and project needs.
A quilt made entirely of Friendship Star blocks creates a stunning, unified look. You can play with color placement to create secondary patterns or a gradient effect across the quilt. Adding sashing between the blocks can give the stars more breathing room and highlight each individual design.
For a scrappy version, use different fabrics for each star, keeping the background fabric consistent. This approach adds charm and personality, especially when using fabric scraps from previous projects.
The block also works beautifully in smaller projects like table runners, pillows, tote bags, or wall hangings. By adjusting the block size, you can adapt the pattern to fit almost any project.
You can also experiment with rotating some of the blocks to create movement within your quilt. This small change can completely transform the overall design.
Finally, consider using the Friendship Star as a focal block in a sampler quilt. Surrounded by other traditional blocks, it adds visual interest and meaning to the quilt’s story.
FAQ – Friendship Star Quilt Block Tutorial – Quilt Pattern
1. Is the Friendship Star block suitable for beginners?
Yes, it’s a great choice for beginners because it uses basic quilting techniques like half-square triangles and straight seams.
2. What is the ideal size for a Friendship Star block?
A common size is 12 inches finished, but you can adjust the measurements to make larger or smaller blocks depending on your project.
3. Can I make this block without a rotary cutter?
Yes, but a rotary cutter and quilting ruler make cutting more precise and faster.
4. How do I keep my star points sharp?
Accurate cutting, consistent seam allowances, and careful pressing are key to keeping points sharp.
5. Can I make a scrappy Friendship Star?
Absolutely! Using different fabrics for each star adds variety and charm.
6. What quilting designs work best with this block?
Straight-line quilting, echo quilting around the stars, or simple free-motion designs all complement this block beautifully.
The Friendship Star Quilt Block Tutorial – Quilt Pattern is a wonderful project that combines tradition, beauty, and meaning. Its straightforward construction makes it accessible for beginners, while its versatility offers endless creative possibilities for more experienced quilters. From fabric selection to final assembly, every step allows you to create a unique piece that reflects your personal style. Whether used in a full quilt, a small decorative item, or as part of a sampler, the Friendship Star remains a timeless favorite.
I hope this guide has inspired you to try this pattern—please share your honest opinion and suggestions so we can continue inspiring and improving together.