
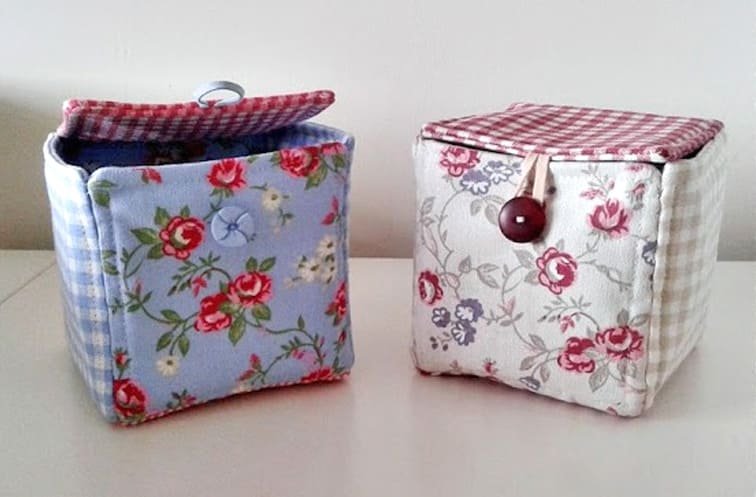
The Fabric Box Bag Tutorial – Quilt Pattern is a delightful project that combines functionality and creativity into one sewing masterpiece. Perfect for holding toiletries, craft supplies, makeup, or even travel essentials, this bag is versatile, stylish, and surprisingly easy to make. Whether you are a beginner quilter or an experienced sewing enthusiast, you will find joy in piecing together fabrics, adding structure, and creating a bag that is both beautiful and practical. With the right techniques, your handmade box bag can look as polished as a store-bought one—only with your unique touch.
In this Fabric Box Bag Tutorial – Quilt Pattern, the process is all about transforming flat quilted panels into a structured, three-dimensional accessory. You can choose fabrics that reflect your personal style—bold and colorful for a fun look, muted tones for elegance, or themed prints for specific occasions. The quilting adds texture and durability, while the boxy shape provides excellent storage space. It’s a rewarding project that allows you to experiment with different quilting patterns, zipper colors, and lining fabrics.
One of the best things about making your own Fabric Box Bag Tutorial – Quilt Pattern is the ability to customize it to any size you want. Need a small version for storing sewing tools? Easy. Want a larger one for toiletries or knitting supplies? Just adjust the measurements. This adaptability makes it a fantastic go-to pattern for gifts, craft fairs, or simply adding handmade charm to your own home organization.
1. Choosing Materials and Preparing the Fabric
Selecting the right materials is the foundation of a successful Fabric Box Bag Tutorial – Quilt Pattern. Quilting cotton is the most common choice because it’s easy to sew and available in endless designs, from floral prints to geometric patterns. For a sturdier bag, you can also use canvas or home décor fabrics, which hold their shape well.
You will also need batting or fusible fleece to give the bag body and softness. This step is essential for the structured shape of the box bag. A medium-weight interfacing can be combined with batting for even more stability.
The zipper is another important component. Choose one that’s sturdy and matches or contrasts with your fabric for visual interest. A nylon coil zipper is often preferred because it’s easy to sew over without damaging your needle.
When preparing your fabric, cut each piece according to the measurements of your chosen size. Don’t forget to cut the lining and interfacing pieces as well. Precision at this stage will make the final assembly smoother.
It’s a good idea to pre-wash your fabric, especially if you plan to wash the bag in the future. This prevents shrinkage and ensures the fabric won’t bleed color.
By taking the time to choose the best materials and preparing them properly, you set yourself up for a professional-looking finish that will last through years of use.
2. Quilting the Panels for the Box Bag
In a Fabric Box Bag Tutorial – Quilt Pattern, quilting is not just decorative—it’s functional. Quilting the panels adds strength, structure, and a beautiful texture to the bag’s exterior. You can use straight-line quilting for a modern and clean look or free-motion quilting for a more intricate, artistic effect.
To begin, layer your outer fabric piece with batting and backing fabric (if desired). Secure them with safety pins or basting spray to prevent shifting during sewing. This sandwich of layers will become your quilted panel.
Using a walking foot on your sewing machine can make quilting smoother, as it helps feed the layers evenly. Choose a thread color that complements your fabric for a cohesive look.
Experiment with quilting patterns like diagonal lines, grids, or even decorative motifs. The design you choose can completely change the style of your bag, making it fun to customize each one you make.
Once quilted, trim the panels back to their exact size. This step ensures all pieces align perfectly when you assemble the bag. Clean, even edges are key to a polished final product.
Quilting may take extra time, but it’s worth the effort. Not only does it make the bag sturdier, but it also gives it a handmade charm that mass-produced bags can’t match.
3. Installing the Zipper and Assembling the Bag
The zipper installation in the Fabric Box Bag Tutorial – Quilt Pattern is a crucial step that affects both functionality and appearance. A well-installed zipper ensures the bag opens smoothly and looks neat.
Begin by placing the zipper face down on the right side of one quilted panel, aligning the edges. Add the lining fabric on top, right side facing down, creating a fabric-zipper-lining sandwich. Sew along the edge with a zipper foot, keeping your stitching straight.
Press the fabrics away from the zipper and topstitch for a clean finish. This not only adds a professional touch but also prevents the lining from catching in the zipper teeth.
Repeat the process for the other side of the zipper with the second quilted panel and lining. You’ll now have a flat, zippered section that will become the top of your box bag.
To assemble the bag, fold it so the outer fabrics are right sides together, aligning the edges. Sew the sides and bottom, then box the corners by folding and stitching across the corner points. This creates the structured shape of the bag.
Turn the bag right side out through the zipper opening, carefully pushing out the corners. The moment you see the box shape take form is one of the most satisfying parts of the project.
4. Adding Finishing Touches and Personalization
Once your Fabric Box Bag Tutorial – Quilt Pattern is assembled, it’s time for the finishing touches. This stage is where you can add personality and make the bag uniquely yours.
Start by giving the bag a thorough press to smooth out wrinkles and define its shape. Pressing also helps set the seams for a crisp, professional look.
You can add zipper tabs for a neat end finish, making it easier to open and close the bag. These small fabric pieces hide the raw edges of the zipper and give the bag a polished appearance.
Consider adding interior pockets to the lining for extra organization. Slip pockets or even small zippered compartments inside the bag can make it more functional.
Embellishments like appliqué, embroidery, or fabric labels can further personalize the bag. If it’s a gift, you might even add the recipient’s initials with fabric paint or iron-on letters.
Another creative option is to make matching sets in different sizes. A small bag for cosmetics, a medium one for toiletries, and a large one for travel gear can be a charming, coordinated collection.
These finishing touches transform your project from simply functional to a treasured handmade item with character and charm.
FAQ – Fabric Box Bag Tutorial – Quilt Pattern
1. Is this project suitable for beginners?
Yes, with step-by-step guidance, beginners can complete the Fabric Box Bag Tutorial – Quilt Pattern successfully, especially if they have basic sewing skills.
2. What size should I make the box bag?
You can adjust the measurements to any size you like, depending on the intended use.
3. Do I have to quilt the fabric?
Quilting is recommended for structure and durability, but you can skip it if you use heavier fabrics and interfacing.
4. What type of zipper works best?
Nylon coil zippers are preferred because they’re easy to sew and durable for daily use.
5. Can I wash the finished bag?
Yes, if you pre-wash your fabrics and use washable materials, the bag can be machine-washed on a gentle cycle.
6. How long does it take to make one bag?
On average, a few hours from start to finish, depending on quilting complexity and embellishments.
The Fabric Box Bag Tutorial – Quilt Pattern offers a wonderful blend of creativity, function, and style. From selecting fabrics and quilting panels to installing the zipper and adding finishing touches, every step allows you to make something both practical and beautiful. This project is adaptable to different sizes, perfect for gifts, and endlessly customizable to reflect your personality.
I hope this guide inspires you to try making your own fabric box bag. Please share your honest opinions and suggestions—I’d love to hear how your project turns out and what creative touches you decide to add.