
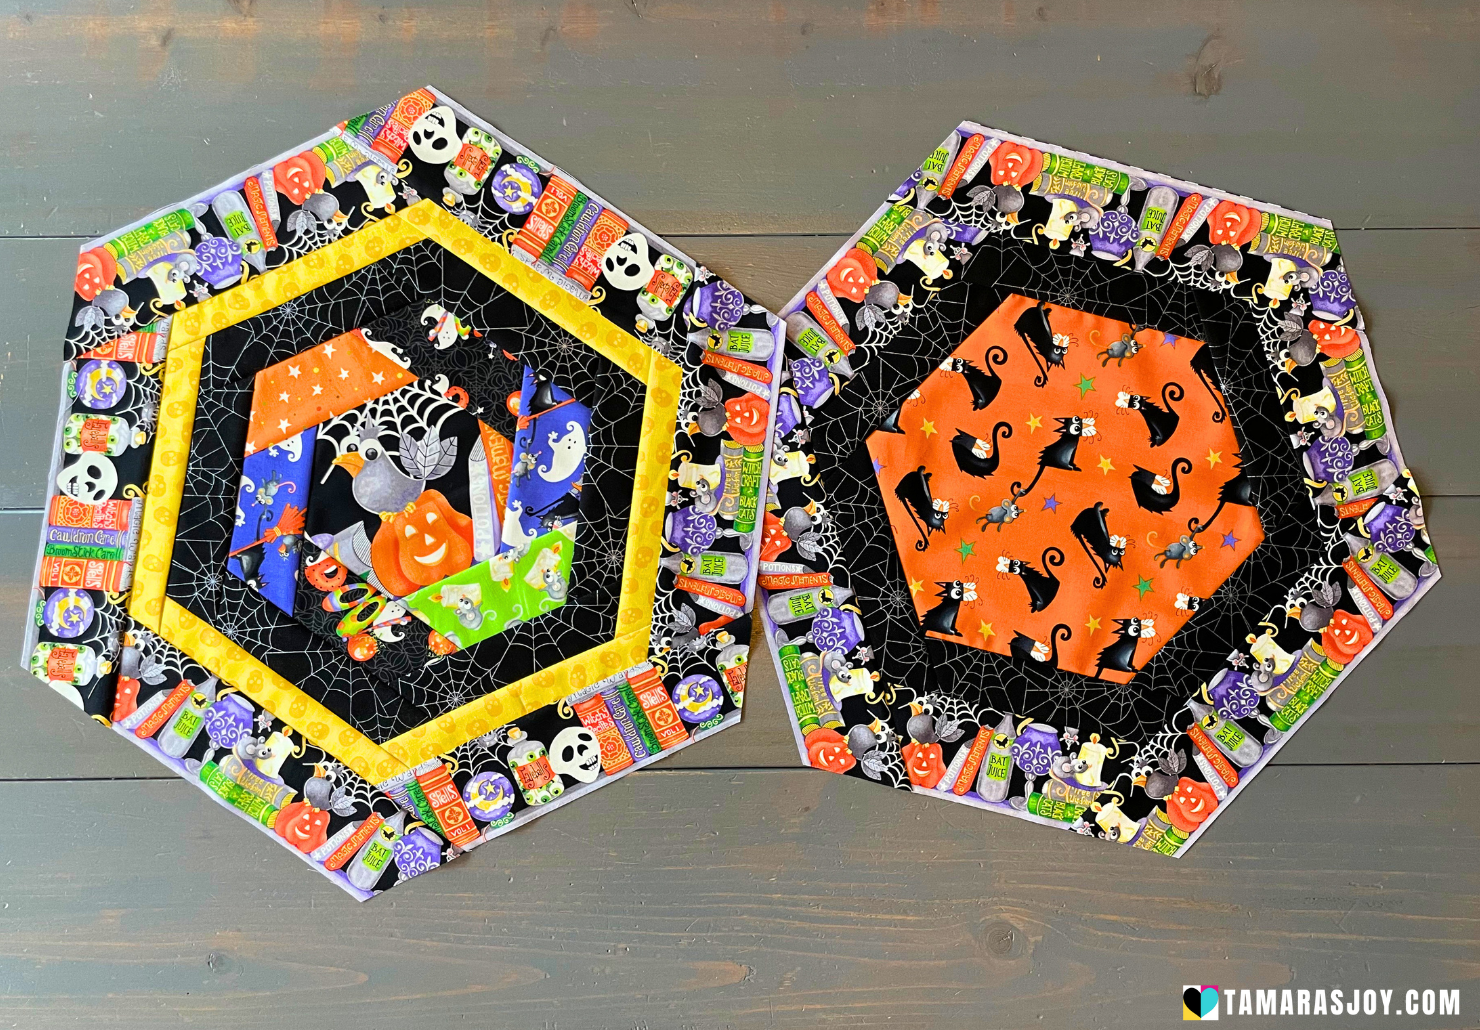
The The Secret to Sewing a Picky Hexagon Table Topper Revealed! – Quilt Pattern is a fascinating quilting project that combines geometry, creativity, and precision. This unique table topper showcases the beauty of hexagon shapes while offering a challenge that both beginner and experienced quilters can enjoy. The hexagon’s six-sided design makes it visually appealing, while the “picky” aspect refers to the careful attention to detail needed for perfectly aligned seams and a crisp, professional finish. This project is ideal for those who want to improve their piecing skills while creating a stunning decorative piece for their home.
Working on the The Secret to Sewing a Picky Hexagon Table Topper Revealed! – Quilt Pattern is not just about sewing—it’s about combining fabric choices, quilting techniques, and a creative vision. This topper can be customized in endless ways: bold and modern with bright solids, soft and traditional with floral prints, or festive with holiday-themed fabrics. Its versatility makes it a great project for any time of the year. Plus, it’s the perfect size for practicing new skills without committing to a full quilt, making it a wonderful option for quick but rewarding sewing sessions.
In this article, we’ll break down The Secret to Sewing a Picky Hexagon Table Topper Revealed! – Quilt Pattern into easy-to-follow steps, from selecting fabrics and tools to cutting, piecing, and finishing. You’ll learn the techniques needed to achieve clean edges, symmetrical shapes, and a polished look. Whether you want to make one for your own table or as a thoughtful handmade gift, this guide will help you achieve a result that’s both functional and beautiful.
1. Choosing Fabrics and Tools for Your Hexagon Table Topper
When starting The Secret to Sewing a Picky Hexagon Table Topper Revealed! – Quilt Pattern, your fabric selection plays a big role in the overall look. Choose fabrics that complement each other in color and pattern while providing enough contrast to make the hexagon shapes stand out. Coordinated fabric bundles can be helpful for ensuring a balanced color palette.
Quilting cotton is a popular choice for this project because it is easy to cut and sew, but you can also experiment with linen blends or batiks for a unique texture. Consider mixing prints and solids for visual interest while keeping the overall design harmonious.
In addition to fabric, you will need basic quilting tools: a rotary cutter, cutting mat, quilting ruler, and a hexagon template. The template is crucial for ensuring each piece is identical, which will make piecing much easier.
You’ll also need batting for the middle layer and a coordinating fabric for the backing. Fusible batting can make the assembly process quicker, as it keeps the layers from shifting during quilting.
Finally, don’t forget high-quality thread that matches your fabrics and sharp sewing machine needles. Having the right materials ensures your project will not only look beautiful but also last for years.
Taking time to select your fabrics and tools with care will make the rest of the sewing process smoother and more enjoyable.
2. Cutting and Piecing the Hexagons
In The Secret to Sewing a Picky Hexagon Table Topper Revealed! – Quilt Pattern, precise cutting is the foundation of success. Even small measurement errors can lead to misaligned shapes that throw off the entire design. Using a clear acrylic hexagon template ensures accuracy.
Begin by cutting strips of fabric slightly wider than the template. Then, use the template and rotary cutter to cut each hexagon individually. Pay close attention to your fabric’s print direction if you want certain patterns to align consistently.
Once all the pieces are cut, arrange them on a flat surface to test your layout. This step helps you see how the colors and prints interact before sewing them together. You can alternate light and dark fabrics or create a gradient effect for added visual interest.
When piecing, sew hexagons together in small sections rather than row by row. This helps maintain alignment and makes it easier to handle the fabric. A ¼-inch seam allowance is standard in quilting, and pressing the seams open or to one side will help keep the blocks flat.
Using pins or sewing clips can prevent fabric from shifting during stitching. Precision here will make the final assembly cleaner and the hexagons perfectly joined.
Once the sections are complete, join them together into the full table topper shape. At this stage, the project will start to take on its beautiful geometric form.
3. Quilting and Assembling the Layers
The quilting stage of The Secret to Sewing a Picky Hexagon Table Topper Revealed! – Quilt Pattern adds both structure and style. Start by layering your completed hexagon top over batting and the backing fabric, making sure each layer is smooth and centered.
Baste the layers together using safety pins or temporary adhesive spray. This step is essential for preventing shifting during quilting, which can cause puckers or distort the hexagon shapes.
When it comes to quilting designs, you have several options. Straight-line quilting along the hexagon edges emphasizes the geometric structure, while free-motion quilting can add decorative swirls or floral patterns that contrast beautifully with the shapes.
Quilt slowly, ensuring each stitch is even. Using a walking foot on your sewing machine can help maintain consistent tension and prevent layers from shifting.
Once quilting is complete, trim the excess batting and backing to match the hexagon shape of your topper. Be precise during trimming to maintain the clean, crisp edges that give this project its professional finish.
With the quilting done, you’re ready for the final step: binding the edges. This will frame your work and protect the raw fabric edges from fraying.
4. Binding and Finishing Touches
The binding stage in The Secret to Sewing a Picky Hexagon Table Topper Revealed! – Quilt Pattern can make or break the project’s overall appearance. For a hexagon shape, you’ll need to carefully miter each corner to maintain the clean geometric look.
Cut binding strips on the bias for easier handling around angles. Attach the binding with a ¼-inch seam, folding and mitering each corner as you go. This step requires patience but results in a sharp, polished finish.
Once the binding is sewn to the front, fold it over to the back and stitch it down by hand or machine. Hand stitching creates a nearly invisible seam, while machine stitching is faster and more durable.
At this point, you can add decorative elements like hand embroidery, small appliqués, or even fabric paint accents to personalize your table topper.
Give the entire piece a final press to smooth any wrinkles and set the seams. This last step enhances the finished look and ensures it lies flat on your table.
When placed on a dining table, coffee table, or sideboard, your hexagon table topper will stand out as a work of art—both functional and decorative.
FAQ – The Secret to Sewing a Picky Hexagon Table Topper Revealed! – Quilt Pattern
1. Is this project suitable for beginners?
Yes, beginners can make this table topper, though patience and attention to detail are key for aligning hexagons correctly.
2. What size should I make my hexagons?
Standard sizes range from 2 to 4 inches per side, but you can adjust based on your desired finished size.
3. Do I need a special sewing machine for quilting?
No, a regular machine with a walking foot is sufficient for quilting this project.
4. Can I make this without a hexagon template?
While possible, using a template ensures accuracy and saves time.
5. What quilting pattern works best for this topper?
Straight-line quilting along hexagon edges is classic, but free-motion designs add unique flair.
6. How do I prevent fabric from stretching while sewing?
Use pins or clips and sew slowly, maintaining even pressure to keep the shapes aligned.
The Secret to Sewing a Picky Hexagon Table Topper Revealed! – Quilt Pattern is a rewarding quilting project that blends precision, creativity, and style. From choosing the right fabrics to cutting perfect hexagons, quilting with care, and finishing with crisp binding, each step offers an opportunity to refine your skills. Whether you’re making it for your own home or as a heartfelt gift, this table topper is sure to impress.
I hope this guide has given you the confidence to try it yourself—please share your honest thoughts and suggestions so we can continue inspiring each other in our quilting journeys.